Contents
General notes about the labs
Often the lab instructions are intentionally open-ended, and you will have to figure some things out for yourselves. This module is designed to be challenging, as well as fun!
However, we aim to provide a well planned and fluent experience. If you notice any mistakes in the lab instructions or you feel some important information is missing, please let us know and we will try to address any issues.
Preparation
For the networking part of this module, we are going to use a set of security labs called Labtainers. Labtainers were developed by the Naval Postgraduate School, and use Docker containers to emulate different components in a network.
Action: Start by logging into Hacktivity.
Click here for a guide to using Hacktivity. This includes some important information about how to use the lab environment and how to troubleshoot during lab exercises. If you haven’t already, have a read through.
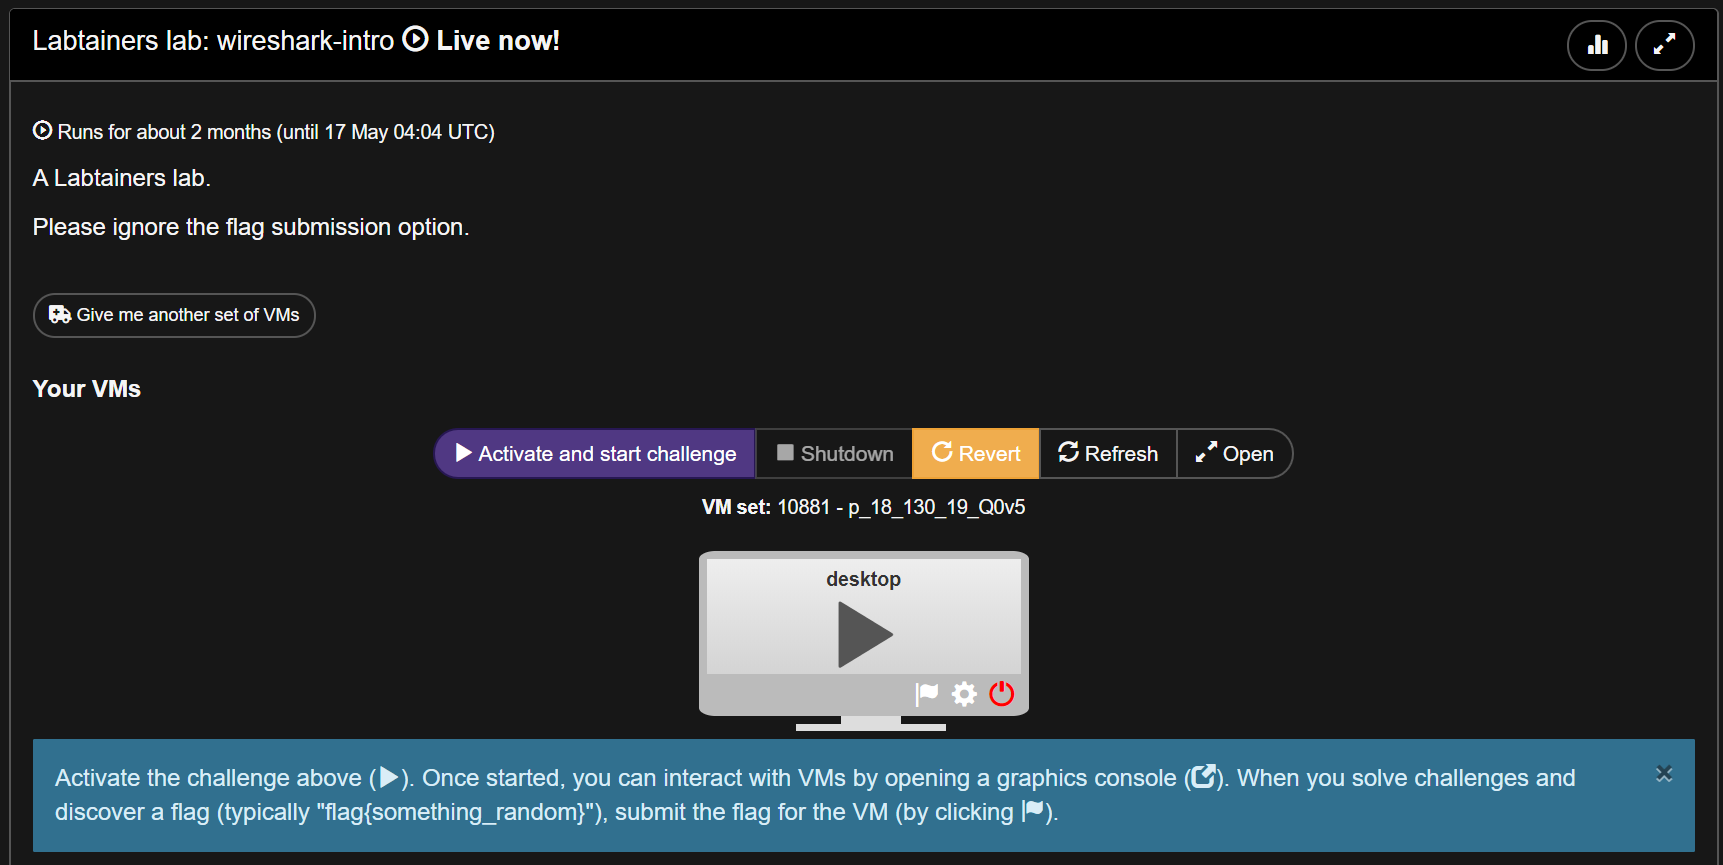
There is one VM per lab and each VM hosts a number of containers. ==action: Click on “Labtainers lab: wireshark-intro” to run the first lab==.
Tip: Feel free to read ahead while the VM is starting.
Log in to Labtainers and work through learning tasks
==action: Work through the following labs (and refer to the tips below):==
- wireshark-intro
- packet-introspection
- pcapanalysis
- iptables
- iptables2
- vpnlab
- vpnlab2
General tips
Labtainers asks you to submit different files to your instructor to show them that you have completed the exercises. There is no need to send the files to us. Refer to the tips below to check whether you completed the labs correctly.
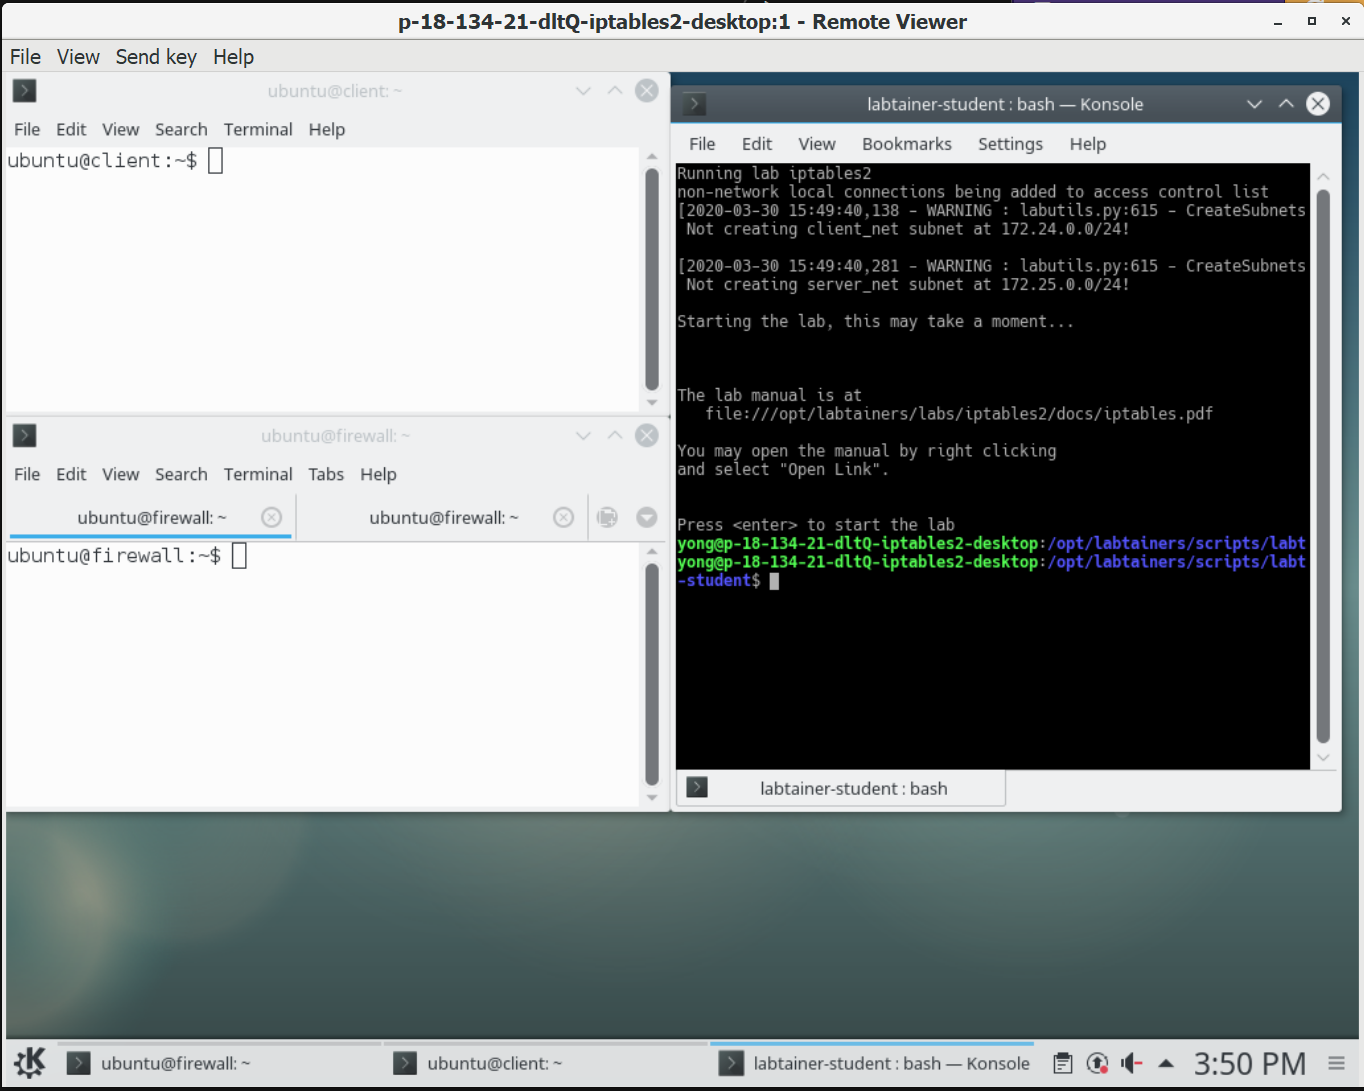
When you start a Labtainers VM, you will get a dark terminal and some white ones which could have multiple tabs. The dark terminal is responsible for launching the containers and running the lab. You don’t usually have to interact with it. The white terminals are part of the lab exercises. Each represents a connection to a host (container). You are expected to interact with them to complete the exercises.
wireshark-intro
Wireshark is a tool used to analyse packets at network level. You will have had an introduction to it in previous modules, but since we will be using Wireshark a lot in this week’s lab, it doesn’t hurt to have a refresher.
The instructions for this lab are in a text file that opens automatically in a terminal. ==action: Use the arrow keys to scroll down==.
==action: You must start wireshark from the wireshark-intro terminal that appears when you start the lab==.
==action: Use a filter to narrow down the results==.
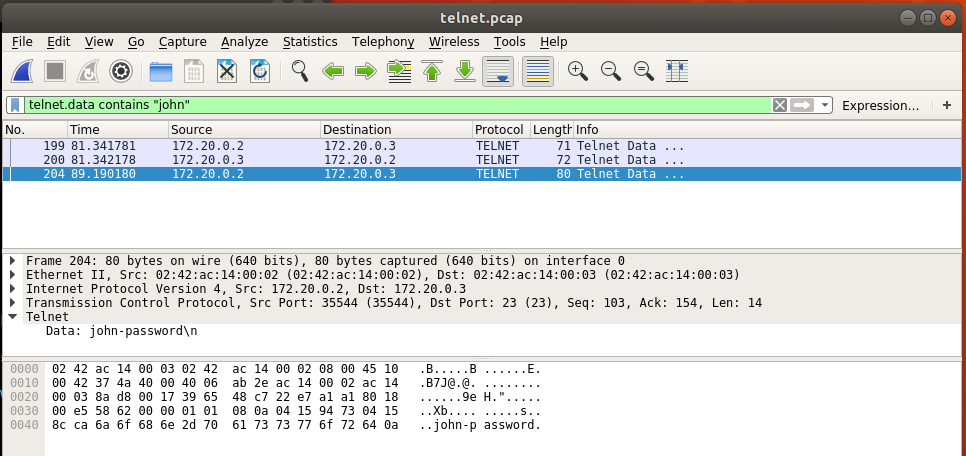
==action: Right click on the packet and select Follow/TCP Stream==.
Note: You can save your results as a “.pcap” or “.pcapng” file.
Well done, you have completed the first lab. ==action: Close the VM and move onto the next challenge==.
packet-introspection
In this lab, you will learn more advanced Wireshark functions for packet analysis at network level.
Warning: Don’t forget to start Wireshark from the container running the lab, not the host VM. Follow the example below:

After you’ve saved your image at the end of the lab, ==action: you can open it from the terminal using the following command:==

If you are successful, you will be able to see the image:

Well done! ==action: You can now close your VM and move onto the next challenge==.
pcapanalysis
In this lab, you will learn how to use tshark, a terminal-based packet analyser. ==hint: Use the hint below to locate the single frame that the exercise is asking for==.

iptables
Iptables are a command line firewall for Linux systems. They target packets at network level and allow you to configure specific rules to control traffic coming in and going out of the server.
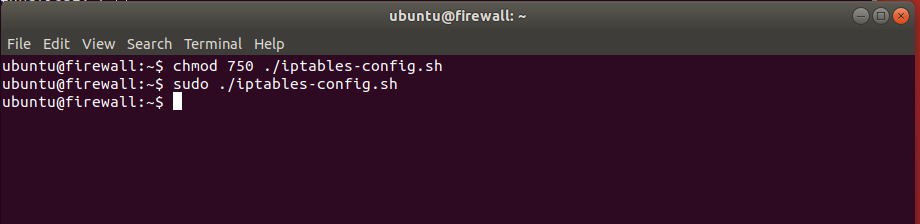
Your goal in this lab is to use iptables to prevent the firewall from forwarding all traffic to the server, with the exception of HTTP on port 80 and SSH on port 22. ==action: Using the Vi text editor, create a file called iptables-config.sh==. ==action: Read through the contents from this script to understand what it does, then copy and paste it into the iptables-config.sh file==.
==action: Make your script executable and run it using sudo:==
==action: Verify that only ports 22 and 80 are open by running nmap from the client terminal:==
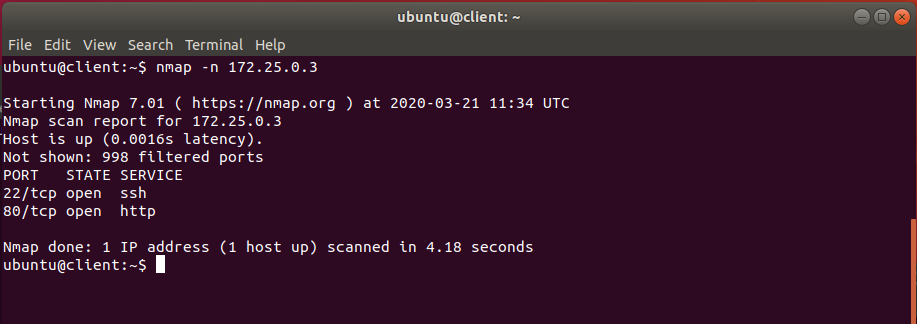
Well done for completing the challenge!
iptables2
==action: Use the command below to run “wizbang” on the client terminal:==
./wizbang start
==action: You will need to edit the “example_fw.sh” script to create a rule that allows traffic on port 10090==. ==hint: Look at the rule for port 22 and follow the example==. ==action: After you are done editing the file, don’t forget to run the script again==.
The result of your nmap scan should look like this once you’ve completed the lab (note the ports open): 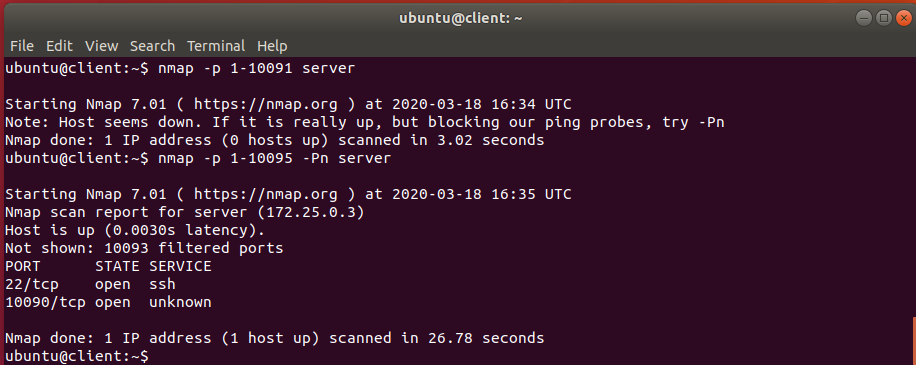
==action: You can now move onto the next challenge==.
vpnlab
A Virtual Private Network (VPN) creates a secure encrypted channel through which two machines exchange information over the internet. In this lab, you are going to learn how to create a simple host-to-host VPN using openvpn and a static shared key.
The instructions for this lab are in a text file that opens automatically in a terminal. ==action: Use the arrow keys to scroll down==.
vpnlab2
This is a very similar lab to the previous, the only difference is that you will be using a VPN gateway. ==action: Use the arrow keys to scroll down the text file that appears containing instructions for this lab==.
Conclusion
At this point you have:
-
Learned how to analyse packets at network level and gained practical experience using two different packet analysers: Wireshark and Tshark
-
Used Labtainers to gain a practical understanding of iptables and configured basic firewall rules independently
-
Learned about VPNs and implemented a simple host-to-host VPN using openvpn and a static shared key
-
Configured a VPN gateway using openvpn.
Congratulations! In this lab, we shifted our attention from the application layer to the network layer of the OSI model. Instead of using a web proxy to analyse requests and responses, we focused on packet analysis at network level and looked at ways to control access to the network (firewalls) as well as ways to secure communication between the network and trusted hosts using the wider internet (VPNs). We also switched learning environments and completed this week’s challenges on Labtainers.