Contents
General notes about the labs
Often the lab instructions are intentionally open-ended, and you will have to figure some things out for yourselves. This module is designed to be challenging, as well as fun!
However, we aim to provide a well planned and fluent experience. If you notice any mistakes in the lab instructions or you feel some important information is missing, please let us know and we will try to address any issues.
Preparation
Action: For all of the labs in this module, start by logging into Hacktivity.
Click here for a guide to using Hacktivity. This includes some important information about how to use the lab environment and how to troubleshoot during lab exercises. If you haven’t already, have a read through.
Action: Make sure you are signed up to the module, claim a set of VMs for the web environment, and start your Kali VM and Web_Server VM.
Feel free to read ahead while the VM is starting.
==VM: Interact with the Kali VM==. (Click the launch icon after the VMs have started):
![]()
==action: Login with username “kali”, password “kali”==.
Introduction to the approach to lab activities for this module
This module makes use of these great learning resources (amongst others):
- Damn Vulnerable Web App (DVWA): a vulnerable website (written in PHP)
- OWASP WebGoat and WebWolf: an interactive teaching environment for web application security (written in Java)
- OWASP Security Shepherd: a CTF style set of challenges, with some additional training built-in (written in Java)
These lab sheets will guide you through your use of the above and also introduce some important fundamental concepts and techniques.
Web fundamentals
As this lab focuses on web application security it is worth starting with some background of what we mean by the web and how it works. A useful way of thinking about the technologies and protocols involved is to consider…
What happens when you visit a website in your browser?
- You type a URL (e.g.
http://www.leedsbeckett.ac.uk) into the address bar of your web browser (e.g. Google Chrome) and press enter or click go. - Your browser sends a request to a web server over the network.
- The web server processes the request and sends a response.
- Your browser interprets and presents the response.
This interaction takes place using the HTTP protocol, which operates the Application layer of the TCP/IP stack.
Note: The above is simplified to focus on the web application layer. In reality, there are additional networking steps involved (DNS lookup to resolve domain names to IP addresses, TCP connection establishment, routing through network infrastructure, etc.). These topics are out of scope for this lab, but we will cover them in depth later in the module.
Understanding the Web and client-server interactions
HTTP (HyperText Transfer Protocol) is a client-server protocol that involves a client (for example a Web browser, such as Firefox or Chromium) making requests for web pages from the web server (such as Apache or IIS).
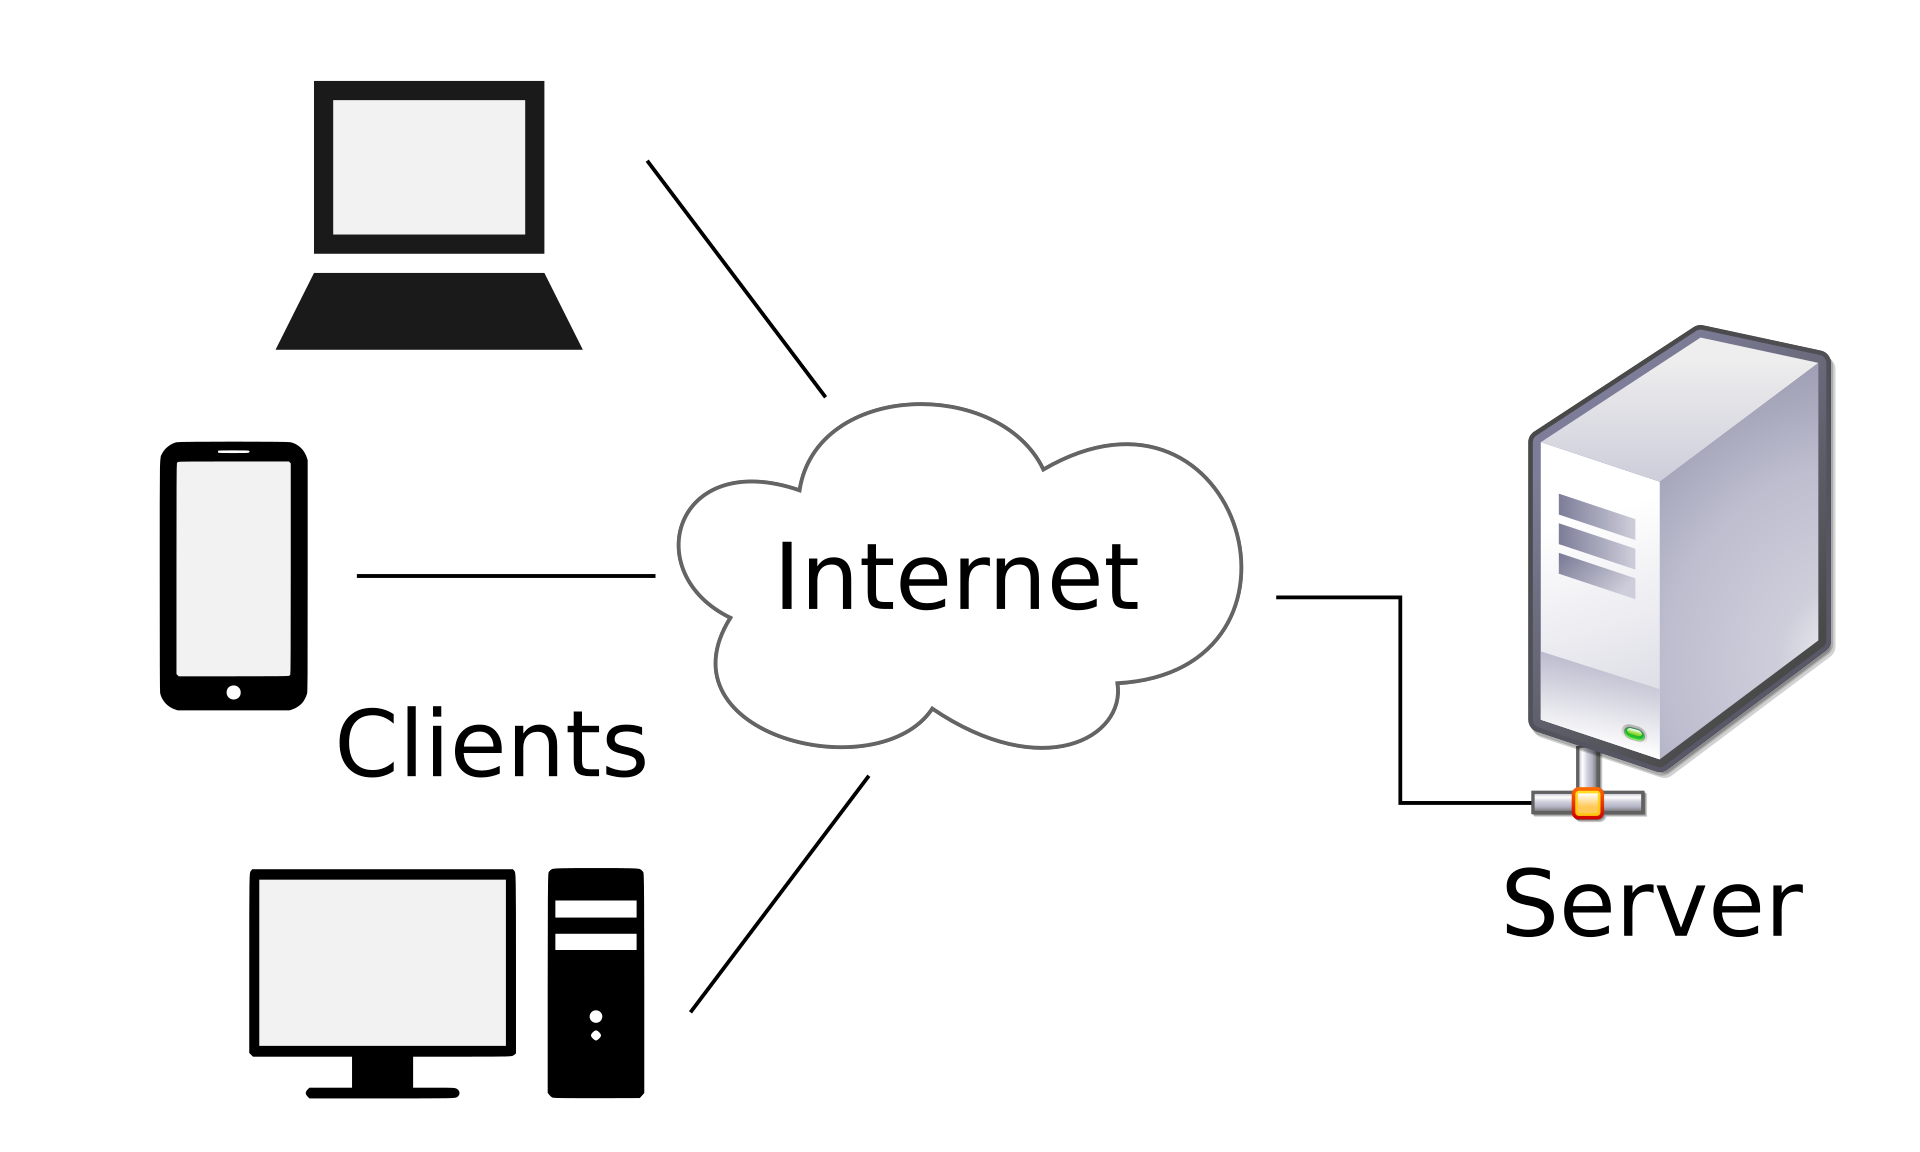 Client-server architecture. Image: Gnome-fs-client.svg by David Vignoni [LGPL (http://www.gnu.org/licenses/lgpl.html)]
Note that the server software can be on a remote “server” computer (as in the figure above), or as you will see throughout this module, we can also host web server software locally on your own computer, and access the pages via a web browser.
The simplest web server
It can help build our understanding of how the web works, by using very simple tools to build/simulate a web server from scratch.
For our first example, you are going to use netcat to manually write the webpages in response to a web browser request.
==action: Open a terminal== (“Applications” menu, “Accessories”, “Terminal”) or click on this icon at the top of the Kali desktop:

==action: Start a simple tcp server, listening on port 8070 using netcat:==
nc -l -p 8070
Note: Most websites are hosted on tcp port 80 (http) or port 443 (for https, encrypted); however, you can specify another port, such as 8070, and include that in the URL you enter into a web browser.
==action: In Firefox open a new tab and visit:==

http://localhost:8070/hello.html
Netcat will show the request that the web browser made:
GET /hello.html HTTP/1.1
Host: localhost:8070
User-Agent: Mozilla/5.0 (X11; Linux x86_64; rv:68.0) Gecko/20100101 Firefox/68.0
Accept: text/html,application/xhtml+xml,application/xml;q=0.9,*/*;q=0.8
Accept-Language: en-US,en;q=0.5
Accept-Encoding: gzip, deflate
Connection: keep-alive
Upgrade-Insecure-Requests: 1
This information includes the URL the web browser wants to access (/hello.html), and the encoding methods it accepts.
The web browser is now waiting for the server to respond.
==action: Type (or copy-paste) a response into the netcat server, to send back to the web browser:==
HTTP/1.1 200 OK
Server: netcat
Content-Type: text/html

<html><body>
<h1>Here's a web page!</h1>
Hello!
</body></html>
Tip: Make sure you have an empty line where the headers finish, before the <html>.
This response from our web server includes the server software (netcat), the type of information sent (a web page), and the content of the page to display.
==action: Press Ctrl-C to close the connection==.
Your web browser will display the web page.
Clarifying terms: “Server” and “Dynamic”
Two terms which often cause confusion when first familiarising yourself with the technologies involved in the web are “server” and “dynamic”. Each has two meanings depending on the context it is used in.
The two types of “server”:
- Server (the machine): The physical/virtual computer hosting the website
- Server software stack:
- Web server software handles HTTP communication (e.g., Apache, nginx, PHP’s built-in server)
- Web application generates content and implements functionality (e.g., your PHP scripts, a WordPress site, an online shop)
- Often these work together: web server receives request → passes to application → application generates response → web server sends it back
When we say “the server sends a response” or “receives a request”, we are talking about the software and not the computer.
The two types of “dynamic”:
- Client-side dynamic: JavaScript code runs in your browser and can respond to user actions without contacting the server (e.g. button changes color when clicked, form validation, dropdown menus, animations, etc.)
- Server-side dynamic: Code runs on the server before sending HTML (e.g., page shows current time, pin is checked, account credentials are checked, session is initialised in the database, etc.)
The next section involves creating a simple dynamic web application server with PHP.
A simple dynamic web page using PHP
PHP is both a server-side programming language and can act as a simple web server (via php -S). When PHP’s web server receives a request, it executes your PHP code on the server, generates HTML, and sends it to the client. The browser receives plain HTML - it doesn’t know PHP was involved. This is different from our netcat example, where you manually typed the response.
==action: Create a new file:==
vi hello.php
Vi is a powerful text editor available on most Linux systems. Vi is ‘modal’: it has an insert mode, where you can type text into the file, and normal mode, where what you type is interpreted as commands. ==action: Press the “i” key to enter “insert mode”==. ==action: Type your changes to the file, then exit back to “normal mode” by pressing the Esc key==. Now to ==action: exit and save the file press the “:” key, followed by “wq” (write quit), and press Enter==.
==action: Enter and save this content:==
<html><body>
The time is: <?php echo date("h:i:sa"); ?>
</body></html>
==action: Self-host this PHP, using the PHP built-in webserver:==
php -S 127.0.0.1:8075
Note: 127.0.0.1 is the IPv4 loopback address for localhost (it connects back to the same computer, locally). We need to tell the PHP built-in-webserver to listen on a specific IP address.
==action: From Firefox visit:==
http://localhost:8075/hello.php
You should see our dynamic page load. The webserver is calculating the current time, and using this information to generate the website, which is then fed back in a reply to the web browser to display.
==action: Press F5 to refresh==.
Leave the PHP server running, and ==action: open another console tab (Ctrl-T)==.
The simplest web client (“browser”)
Ok, so you now understand the server’s role, you can also use netcat to play the role of the browser.
==action: Run:==
nc localhost 8075 -C
Note: The -C instructs Netcat to send CRLF for the newlines.
The Netcat process will connect to the PHP server running locally, and now you can type in commands to send to the server. ==action: Type:==
GET /hello.php HTTP/1.1
Host: localhost
==action: Press the Return key twice==.
Tip: After starting Netcat you will need to type the above quickly.
==action: Read through the web server response==.
The server will respond with the HTML for a webpage. This is exactly how a Web browser works, except that the browser takes the HTML code and uses it to render and display the page graphically.
==action: Browse to the same page using Firefox http://localhost:8075/hello.php, and right-click the page and “View Page Source”==. Confirm this is the same source you obtained manually.
The example above demonstrated dynamic functionality which did not involve user interaction, where PHP code ran on the server to find the time and then inserted it into the HTML data before sending the response.
Sending data to the server
If we wanted to build a dynamic application which responded differently depending on data sent from the client, we need a way of sending additional data to the server in addition to just the URL.
HTTP Methods / Verbs
The HTTP protocol provides a number of methods for interacting with a server which provide an indication of what the client is trying to achieve. The most common methods are: GET, POST, PUT, and DELETE.
GET requests indicate that a client wants to retrieve a resource from the server. Data is conventionally attached to at the end of a URL in key-value pairs. For example:
https://www.google.com/search?q=web+security
https://www.youtube.com/watch?v=tmVObMBDzFE&list=PLUhmDd3hiISnCZksY71qyRit-F_riNDFk
Explanation:
In URLs the ? character at the end of the URL indicates the start of the GET parameter data.
The first example has one parameter:
- The
q=web+securityis the key:value pair - The
qcharacter is the key (short for ‘query’, google’s chosen variable name for searches) - The
web+securityis the value (the search term.
In the second example there are two GET parameters, separated by a &.
POST requests indicate that a client wants to submit some data to the server (e.g. submitting a login form). Data in POST requests is typically included within the request body.
PUT and DELETE requests are less common in traditional web applications but important in modern web APIs. PUT typically sends data in the request body (similar to POST) to update a resource. DELETE usually only needs the URL to identify what to delete.
This next section focuses on GET parameters as they are the simplest to understand and manipulate.
A dynamic web page with GET parameters using PHP
The following example involves creating basic PHP server-side application for checking a 3-digit PIN code.
==action: Create a new file:==
vi pin.php
In the following program, if the GET parameter value matches the PIN of 123, the application grants access. If not, it reports that the PIN is incorrect.
==action: Enter and save this content:==
<html><body>
<?php
if (!isset($_GET["pin"])) {
  echo 'Missing PIN';
} elseif ($_GET["pin"] == 123) {
  echo 'Access granted!';
} else {
  echo 'Incorrect PIN';
}
?>
</body></html>
Note: Reminder: Vi is ‘modal’. ==action: Press the “i” key to enter “insert mode”==. ==action: Type your changes to the file, then exit back to “normal mode” by pressing the Esc key==. Now to ==action: exit and save the file press the “:” key, followed by “wq” (write quit), and press Enter==.
==action: From Firefox visit:==
http://localhost:8075/pin.php
Assuming you still have the PHP built-in server still running (from above), you should see our dynamic page load, and a message saying the PIN is missing.
Note: If your PHP server is not running, re-launch it by running:
php -S 127.0.0.1:8075
==action: Try sending a number:==
http://localhost:8075/pin.php?pin=1
Finally, as we know from the source code, ==action: send the correct PIN:==
http://localhost:8075/pin.php?pin=123
Now that we have a basic web application which accepts data, we can take a look at ways in which an attacker can intercept and manipulate requests using a web proxy.
Using a local Web proxy to intercept and modify Web traffic
“Zed Attack Proxy (ZAP) is a free, open-source penetration testing tool being maintained under the umbrella of the Open Web Application Security Project (OWASP). ZAP is designed specifically for testing web applications and is both flexible and extensible. At its core, ZAP is what is known as an “intercepting proxy.” It stands between the tester’s browser and the web application so that it can intercept and inspect messages sent between browser and web application, modify the contents if needed, and then forward those packets on to the destination. In essence, ZAP can be used as a “man in the middle,” but also can be used as a stand-alone application, and as a daemon process.”
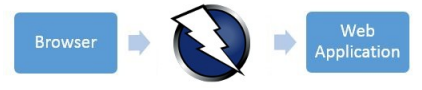
Using ZAP enables you to intercept HTTP requests between your browser and the web server you are testing. This is an important technique that enables you to test the security of websites.
==action: Start OWASP Zap== (“Applications” menu, “03 - Web Application Analysis”, “Zap”).
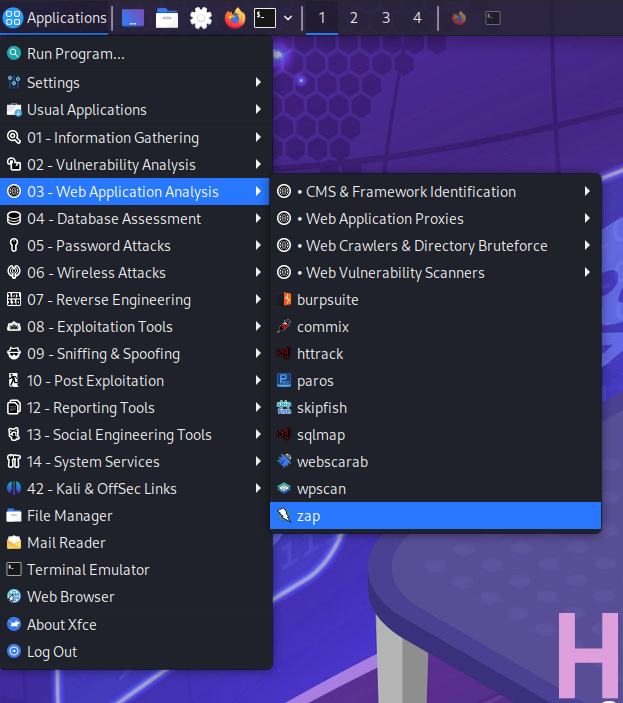 Starting OWASP Zap
==action: Wait for the proxy to start==. Select, “No, I do not want to persist this session at this moment in time”, don’t check for updates if prompted, then ==action: Click “Start”==.
You can get help by pressing F1.
Also please refer to the ZAP userguide: https://www.zaproxy.org/docs/desktop/
This introduction video gives an overview of ZAP:
==action: The easiest way to start using Zap, is to click Manual Explore on the Quick Start tab, and enter the URL of the website, in this case “http://localhost:8075/pin.php”, and click “Launch Browser”==.
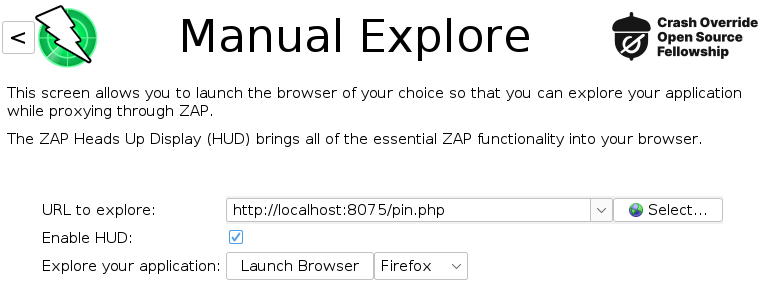 ZAP Manual Explore interface
A new instance of Firefox will start, now with all traffic routed through Zap.
Note: All of Firefox’s Web traffic will now be sent via the Zap program, which is acting as a local proxy. This enables you to view and modify any requests sent to or received from the server.
Zap has two interfaces: the traditional one you see when you first open the application, and the HUD (Heads Up Display), which appears as an overlay on top of the browser. Ultimately, it is down to personal preference which interface you use.
Optional: take the HUD tutorial.
==action: The HUD can be disabled by clicking on the green button:==
 HUD disable button
==action: Refresh the page in Firefox (F5), switch to the Zap window interface and view the information that Zap has collected==.
==action: Within the History Tab, select an item and view the “Request” and “Response” by clicking on those tabs above==.
==action: In ZAP Tools/toggle break on all requests to experiment with intercepting the messages being sent between the browser and the server==.
Read the below excerpt from the ZAP UI guide to understand how to enable and disable interception of HTTP/S requests and responses:

 Set / Unset break on all requests and responses
This sets and unsets a ‘global’ break point that will trap and display the next request or response in the Break tab. You can then change any part of the request or response that you want to and send it to the target application by pressing either of the ‘Step’ or ‘Continue’ buttons. Alternatively you can press the ‘Drop’ button to dispose of the request or response. You can switch between a single ‘combined’ break button and separates ones for requests and responses via the Options breakpoints screen
 Step button
This allows the trapped request or response to continue to the application or your browser with any changes that you have made to it. The ‘global’ break point will remain set so that the next request or response will also be caught. This button is only enabled when a request or response is trapped.
 Continue button
The ‘global’ break point will be unset so that subsequent requests and responses will no longer be caught by ZAP unless you have set break points on specific URLs. This button is only enabled when a request or response is trapped.
https://github.com/zaproxy/zap-core-help/wiki/HelpUiTltoolbar
==action: Intercept requests by clicking the green icon:==
This sets Zap to break on all requests. The proxy will let you edit all incoming and outgoing HTTP requests before they are sent to the server.
==action: Now back in Firefox, refresh the page==. The page won’t load, since Zap will be blocking the response until you click (or “Step” or “Continue” buttons in the HUD) to progress to the next request/response.
Zap will intercept the request and prompt you to view and potentially alter the request before it is sent to the server. ==action: Experiment by making some changes. Click:==
Note: You can view and modify the HTML source before it reaches Firefox. Make some changes to the HTML response and click “Accept changes”.
==action: Turn off all intercepts==, by unsetting the breakpoint by continuing any intercepted using  or to unset the global breakpoint.
Using local Web proxies enables a security tester to feed unexpected data through to Web servers and analyse responses, potentially exploiting Web-based software vulnerabilities, conducting attacks such as SQL injection or cross-site scripting (XSS).
Fuzzing in Zap
Fuzzing is a term for generating input for software, as a form of black box testing, to test the behaviours for various (and unexpected) input. Zap has fuzzing features which we can use to automate the process of manually trying lots of requests.
==action: Ensure all breakpoints are disabled (so you see a green indicator in Zap)==.
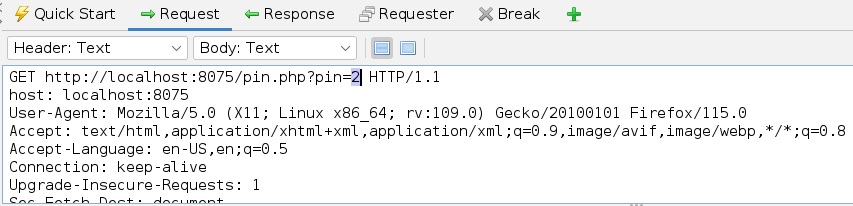
==action: From Firefox access these pages again:==
http://localhost:8075/pin.php

http://localhost:8075/pin.php?pin=1

http://localhost:8075/pin.php?pin=2
==action: From the main Zap window, view the History tab, and click on each of those requests, and view the content of the Request tab==.
==action: Highlight the parameter value sent:==
 Highlighting parameter value in ZAP
==action: Right click, and click “Fuzz…”:==
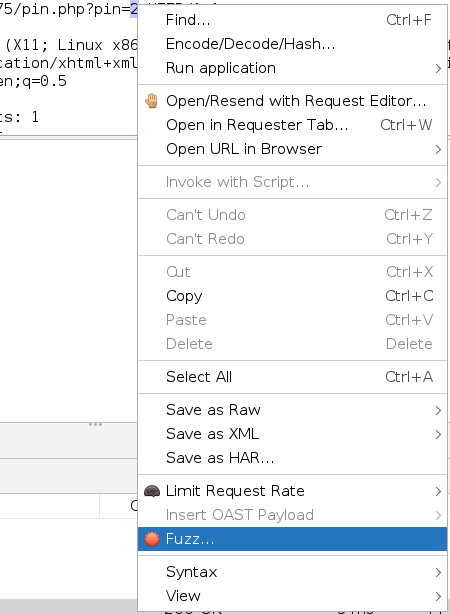 Fuzz menu option
Note: A Fuzz Location is present in the Fuzzer.
==action: Click “Payloads…”==
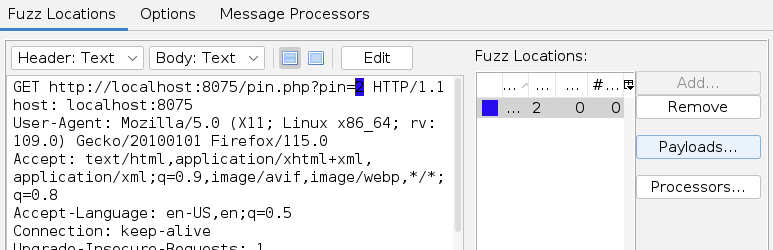 Payloads dialog
==action: Click Add==
==action: Select Type “Numberzz”; From 1 to 999==.
==action: Click “Generate Preview”, and “Add”==.
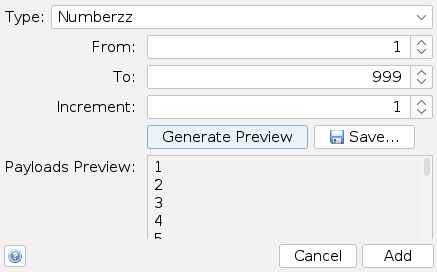 Numberzz payload configuration
==action: Click “OK”, and “Start Fuzzer”==.
The results are shown in the Fuzzer tab.
==action: Click on one of the results, and view the Response tab==.
==hint: Find the correct PIN, by sorting the results by the “Size Resp. Body” column!==
You will get a chance to experiment with other Fuzzer functions such as multiple payloads and payload processors as you complete the challenges below.
As you have seen, web proxy tools like ZAP make it very easy for an attacker to manipulate data being sent from the client. An essential principle in web security is to never trust data from the client.
Log in to WebGoat and work through learning tasks
Your VM has your own instance of WebGoat (running locally on your Kali VM), ==action: access it by visiting:==
http://localhost:8085/WebGoat/login
==action: Create a new user and log in==.
Each week you will be allocated WebGoat lessons to work through. WebGoat is an excellent learning resource, and will enable you to practice and understand the concepts you are later assessed on.
==action: This week, work through:==
- Introduction
- General
Note: The Developer Tools section under General assumes you are using Chrome, and the browser provided with your VM is Firefox. The developer/debugging tools that come with most browsers are fairly similar though, so try using Firefox to follow the tutorial and complete the tasks.
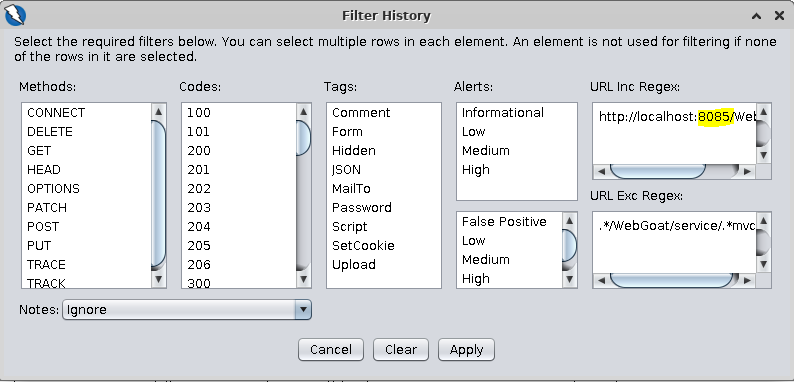
Tip: When setting up the history filters in Zap (General/HTTP Proxies/Part 5), remember to change the port number to 8085 when copying and pasting the URL paths provided.
 WebGoat interface
Login to Security Shepherd and work through assessed tasks
Flag: The flags collected from Security Shepherd, should be entered into Hacktivity. Security Shepherd flags will form part of the module assessment.
There is an instance of Security Shepherd on the Web_Server VM you activated on Hacktivity, you can access it from the kali VM by:
==action: Visit Security Shepherd in Firefox:==
https://webserver/login.jsp
Tip: It’s safe to ignore the certificate error. (Click Advanced, and add an exception.)
==action: Log into Security Shepherd using the username shepherd and the password tiaspbiqe2r== (this is a secure password but its quite easy 2 remember)
If Security Shepherd asks you to change your password, you can do this, but choose one you can remember.
==action: For the first week, complete the lesson / challenges for:==
- Insecure Direct Object References
Tip: For most of the tasks you should first load the task, then toggle the global breakpoints in Zap.
Please try to work through these by first referencing information about the concepts (for example, read about SQL injection attacks), and only as a last resort you may refer to online write ups about how to complete the OWASP Security Shepherd tasks. You will get more from the learning experience by completing the challenges without direct guidance; however, if you are truly stuck there are online resources.
Conclusion
At this point you have:
-
Learned Web fundamentals, and about important web security concepts
-
Simulated the actions of a Web server using Netcat, created a simple dynamic PHP webpage to understand server-side processing, and simulated web browser access
-
Used a web proxy to view and alter client requests and incoming server responses
-
Used a Fuzzer
-
Used WebGoat to learn some basics
-
Used Security Shepherd to learn about some common web security problems, and start building your web security practical skills.
Congratulations! This sets the stage for the rest of the module, where you will dive deeper into these topics.