Contents
Setting up Active Directory and joining Windows clients
Introduction
Here is a guide to help you get started by setting up Active Directory on Windows.
Start by making note of the IP addresses you have been allocated on your VMs. In particular the 10.X.X.X addresses for each VM.
==VM: On your Windows 2016 DC VM:==
Setting up AD
Assigning a static IP
A static IP address needs to be set on the Domain Controller (DC). The DC will also be configured as a DNS for all computers authenticating via AD. Assigning a static IP address assures the IP will not change.
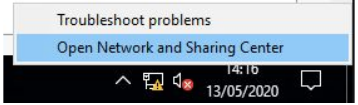
==action: Right-click on the Network Status Indicator on the taskbar and click Open Network and Sharing Centre==
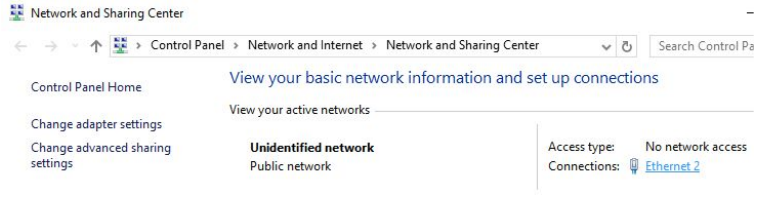
==action: Click on the active connection==, in our case ‘Ethernet 2’ as underlined.
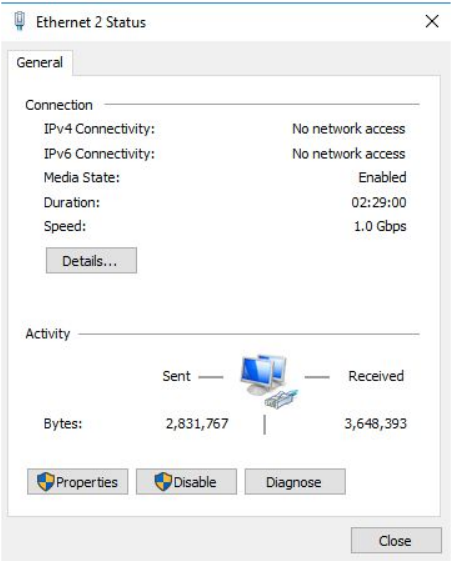
==action: Click Properties on the Status window==
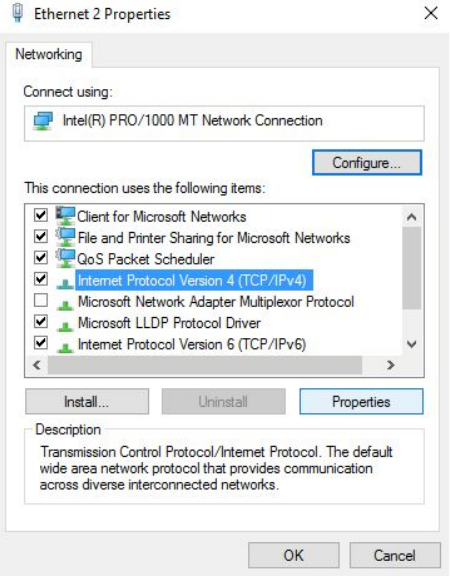
==action: Select Internet Protocol Version 4 then click properties.==
==action: Assign a static IP address in the ‘IP address’ field.== It must follow the same first 3 octets as the other computers on the network which will be connecting to the AD instance.
The subnet will be 255.0.0.0, with DNS servers left blank.
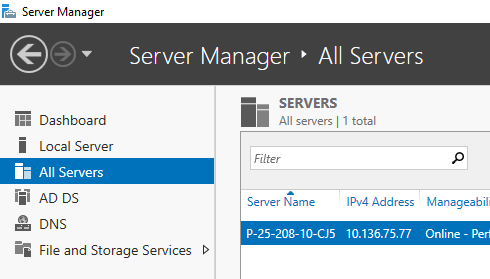
==action: Open Server Manager, go to All Servers==
==action: Press the refresh icon== 
==action: Ensure that the IP address showing has the 10.X.X.X IP address.==
Note: If not, restart the server.
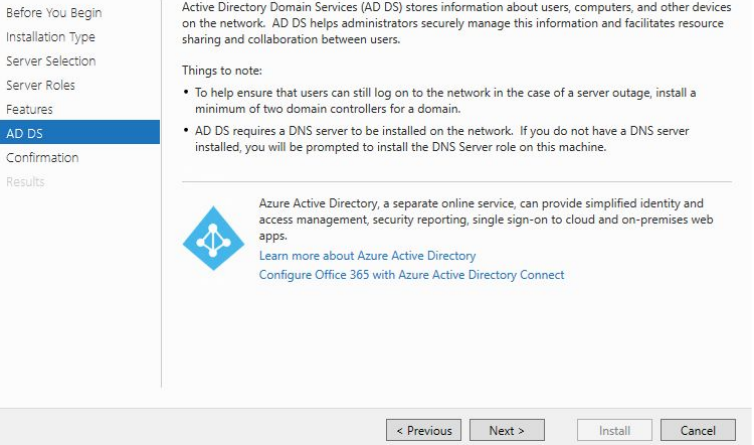
Active Directory Domain Services
Active Directory is used to manage computers, users and groups on a network. AD has several different services, AD domain services open a centralised authentication platform which stores user accounts, metadata, groups, and so on (Microsoft, 2017). This centralised platform is how users will authenticate themselves, it will also control what permissions users have through groups. A server that makes its account database available to other computers on the network is known as a Domain Controller (DC) (Microsoft, 2019).
Installation
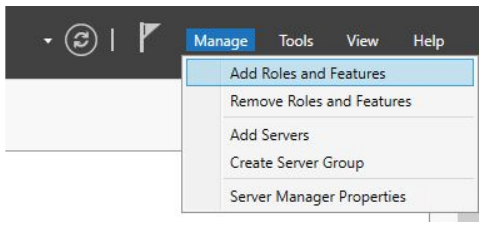
==action: Open Server Manager, go to Manage > Add Roles and Features==
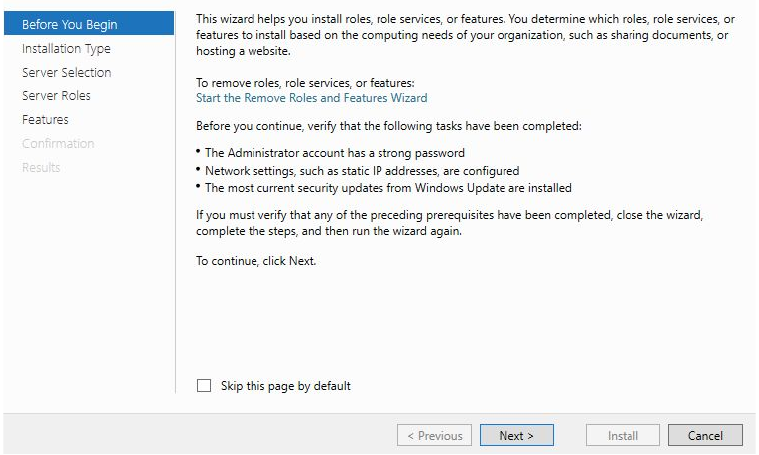
Warnings recommend: a strong password for the administrator account, a static IP is set and security updates are installed.
==action: Click “Next” to continue.==
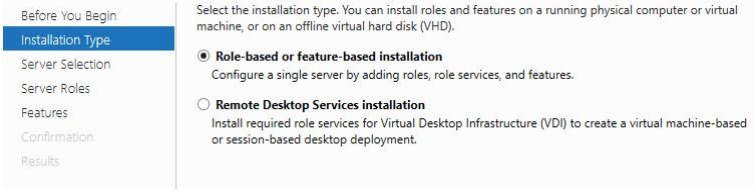
==action: Select Role-based or feature-based installation.== Another option is for setting up AD within a virtualised remote desktop environment (Microsoft, 2017).
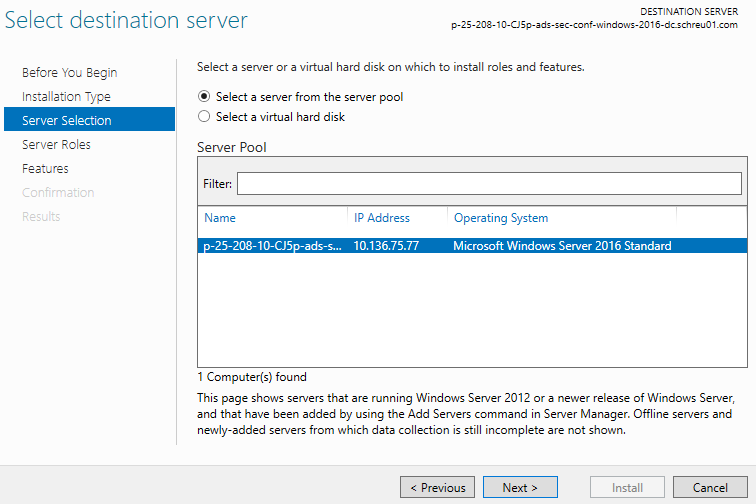
==action: Select the current server== which will install the Active Directory Domain Services.
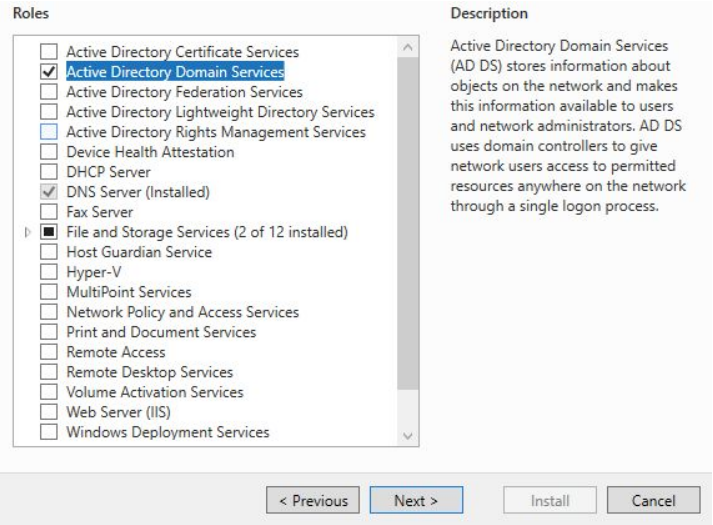
==action: Ensure the DNS Server box is checked.==
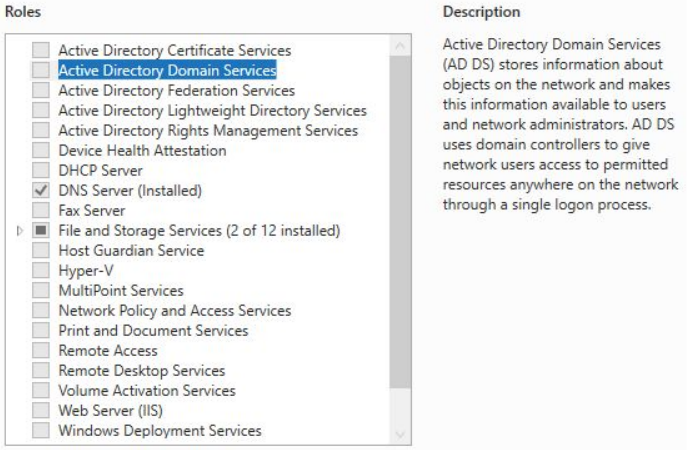
==action: Select Active Directory Domain Services.==
Installing Active Directory Domain Services will also install administration tools.
==action: Click “Add Features” to continue.==

Once Active Directory Domain Services has been checked, ==action: click “Next”.==
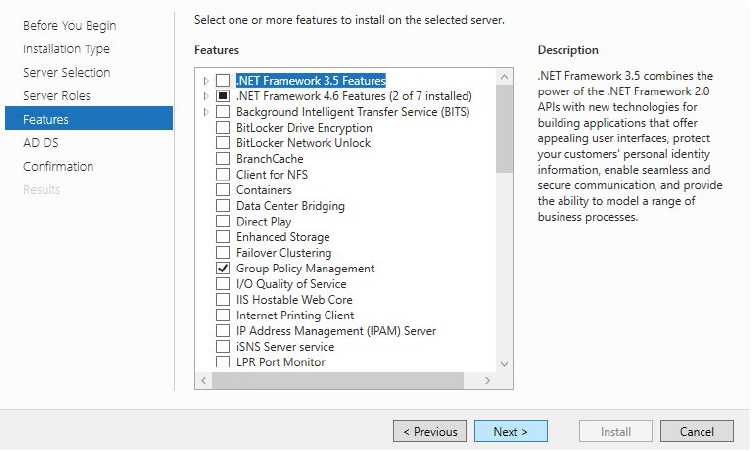
No additional features need to be installed. ==action: Click “Next” to continue.==
Two notes appear. One recommends ensuring there’s another domain controller in case of a server or network issue. The other informs that this server will act as a DNS if one is not configured on the network.
==action: Click “Next” to continue.==
A confirmation appears before the installation begins. ==action: Check “Restart the destination server automatically if required”== to automatically restart the server, which is required to apply changes.
==action: Click “Install” to continue.==
Once the installation completes, ==action: click “Promote this server to a domain controller”==

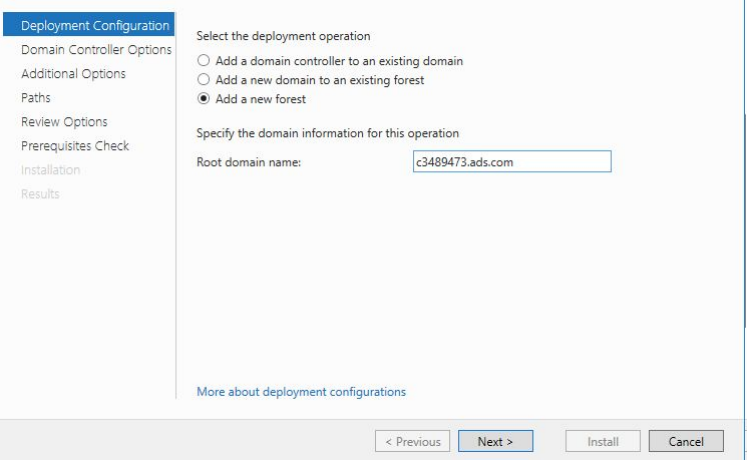
==action: Select “Add a new forest”==, the other options are used for joining existing Active Directory domains.
Next, ==action: enter a Fully Qualified Domain Name (FQDN) in the “Root domain name” form field.==
==edit: Use cNUMBER.ads.com.==
Hosts will appear under this domain name by their hostname followed by the FQDN.
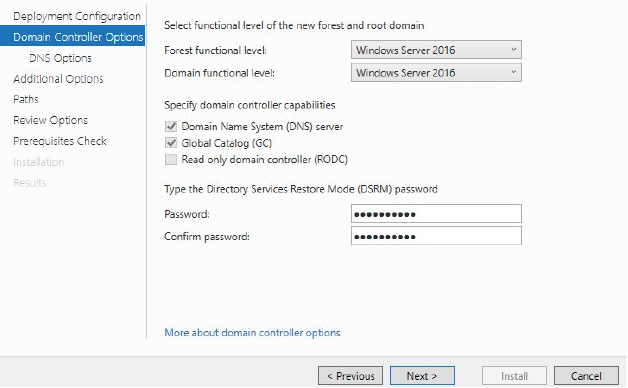
==action: Set a strong password (and make a note of it) for the Directory Services Restore Mode.== The password will be used to boot into recovery mode.
Warning: This should always be different to your Administrator password.
This is the only DC on the network, ==action: keep the DNS server and Global Catalog checked.==
==action: Click “Next” to continue.==
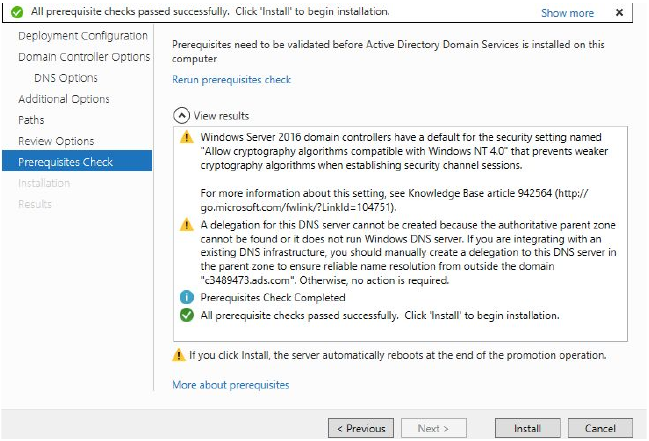
The next window informs us that we’re unable to create a DNS delegation as there is currently no DNS server on the network, the current machine will become a DNS server after installation is complete. DNS delegations refer to hierarchical records in a DNS server which points a child server to a parent DNS server (Microsoft, 2018).
==action: Click “Next” to continue.==

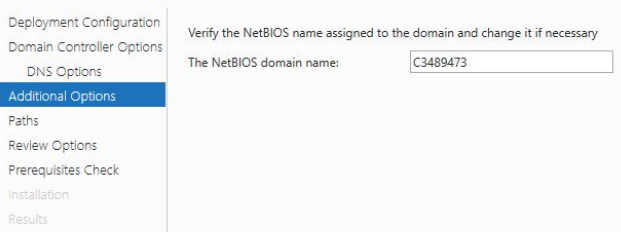
As per the spec, ==action: set the NetBIOS domain name== as your ==edit: cNUMBER==. NetBIOS is a directory service, similar to DNS. NetBIOS was used in older Windows operating systems before Windows adopted DNS (sambawiki, 2020).
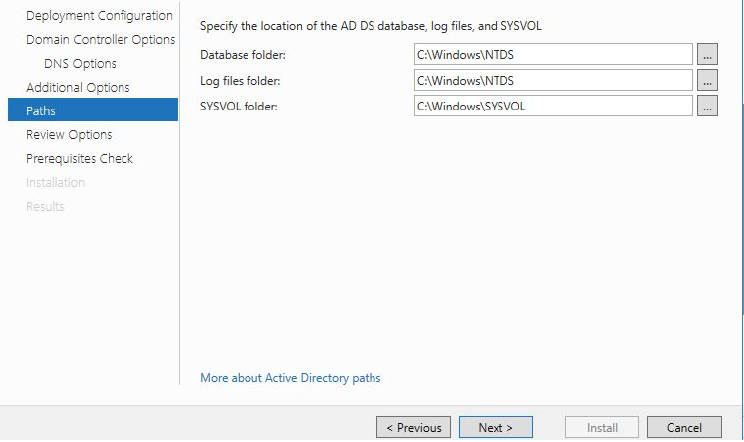
Paths to log files are then shown and can be modified if necessary. ==action: Click “Next” to Continue.==
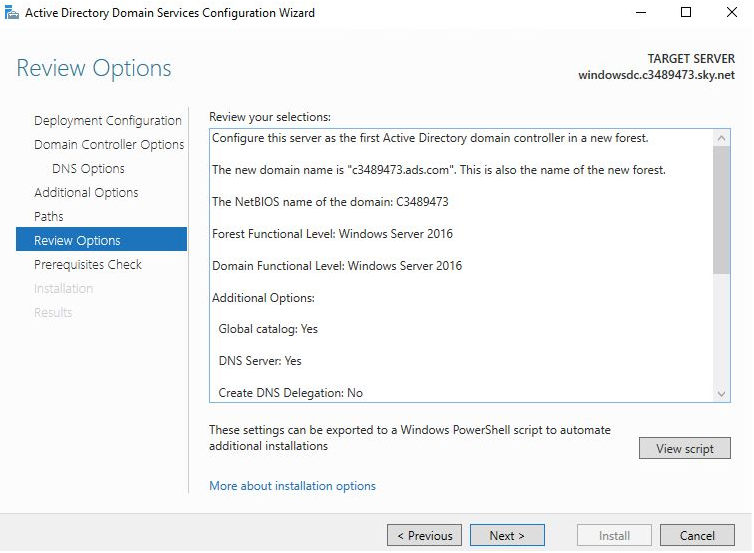
Review options, to continue ==action: click “Next”.==
Two notices appear, one which warns us that due to our updated cryptography settings, there may be problems connecting older Operating Systems. Another notice explains that a DNS server will be installed. ==action: Click “Install” to continue.== A restart will occur.
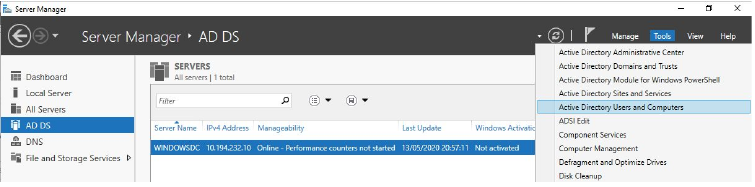
Upon a successful installation of Active Directory Domain Services, “AD DS” will appear in the Server Manager sidebar. There should be new entries under “Tools” including “Active Directory Users and Computers”.
Adding Users
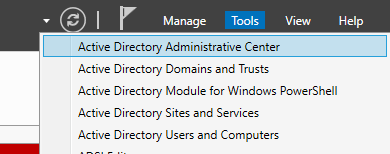
Add a test user to the domain. ==action: Start by launching the Server Manager > Tools > Active Directory Administrative Centre.==
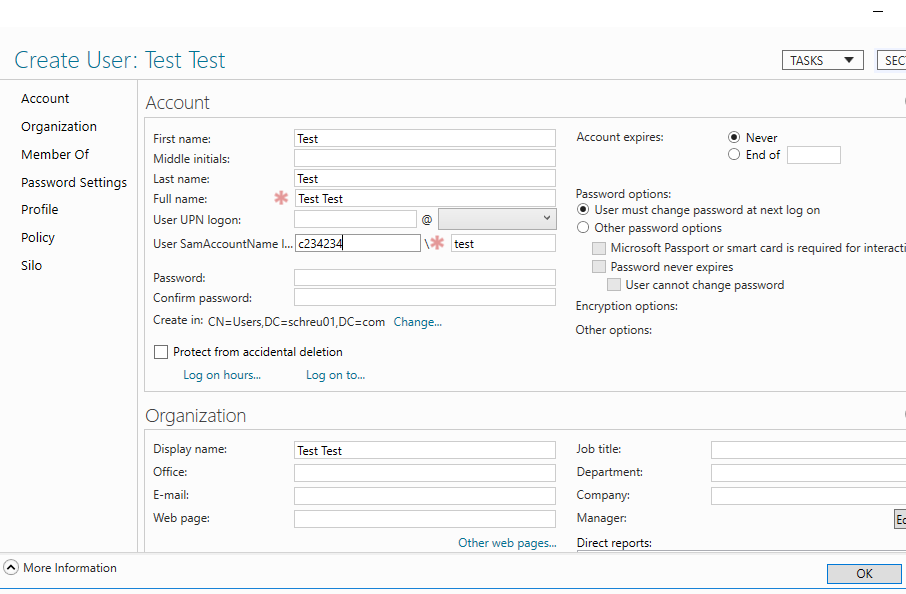
On the right side of the local server, ==action: click Users > New > User==

==action: Create a test user by entering a name and username, and Click OK.==
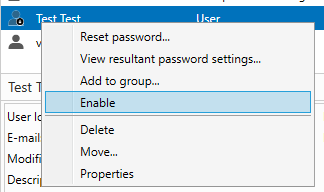
==action: Then right click the user to reset the password, and then enable the account.==
Joining your Windows 7 VM to your new domain
==VM: On your Windows 7 VM==
==action: Open IPv4 Settings, as previously shown.==
==action: Set the DC’s IP as the DNS.==
==action: Open system properties to join the domain and change the hostname.==
==action: Click the ‘Domain’ radio button and type the FQDN for your domain.==
==action: Set a memorable and unique hostname and press “OK”==
==action: Authenticate as administrator to join the domain.== Username: administrator, password: ==edit: your administrator password==.
Note: After a restart, AD accounts can now be logged into.
The end of the beginning
Note at this point you have completed some of the assignment specifications, but you need to further complete the configuration of these systems to meet the requirements and give a reasonable user experience. For example, make sure user home directories are created when users login for the first time, and ensuring that users can login via the graphical login screen.