Contents
General notes about the labs
Often the lab instructions are intentionally open ended, and you will have to figure some things out for yourselves. This module is designed to be challenging, as well as fun!
However, we aim to provide a well planned and fluent experience. If you notice any mistakes in the lab instructions or you feel some important information is missing, please let us know (via GitHub) and we will try to address any issues.
Preparation and logging in
==action: For all of the labs in this module, start by logging into Hacktivity.==
Click here for a guide to using Hacktivity. This includes some important information about how to use the lab environment and how to troubleshoot during lab exercises. If you haven’t already, have a read through.
==action: Make sure you are signed up to the module, claim a set of VMs for this lab, and start your VMs.==
Feel free to read ahead while the VMs are starting.
==VM: Interact with the Kali VM==. (Click the launch icon after the VMs have started):
![]() ==action: Login with username “kali”, password “kali”.==
==action: Login with username “kali”, password “kali”.==
==action: Start the Linux victim server==.
Note: You don’t need to login to the target VM (you don’t need to know the login passwords), just start the VMs.
==action: Note the IP address(es) of the Kali Linux system, using “ip a s”==.
==action: Make a note of the IP addresses for the Linux target: matching the first 3 octets of the Kali system, ending with .2 or .3 for the Linux server==.
Introduction to vulnerability scanning and analysis
Identifying vulnerabilities via ethical hacking and penetration testing requires careful research and planning, and testing the exploits against vulnerabilities typically results in a compromise of the remote system. The advantage of a penetration test (hiring ethical hackers to test security by hacking) is that there are very few false positives (that is, vulnerabilities “discovered” that are false alarms), since the security tester can actually attempt exploits and report whether they were successful.
However, there is always a risk that an exploit may cause unintentional damage, or that the ethical hacker will miss something obvious when they are checking things manually.
An alternative, shallower and automated approach, is to use vulnerability scanning (also known as vulnerability analysis or vulnerability assessment). Vulnerability scanners typically start by performing (or importing) network scans such as port scans and service identification, then automatically checks whether each of the identified services are known to contain vulnerabilities.
The way the security tests are conducted are often simply by comparing the service version that has been detected with the versions known to have vulnerabilities (similar to what you did manually using Security Focus). Vulnerability scanners will often also probe the software further to confirm that the system really does appear to be vulnerable. Some probes can potentially cause crashes, so a safe-mode is typically offered to avoid the more dangerous checks.
There are lots of different vulnerability scanners on the market, many of which are extremely expensive for commercial use (although arguably a necessity for efficient security testing). No-cost evaluation versions are often available for home use.
In this lab you will be scanning a very vulnerable VM, with various tools that aim to provide an assessment of the security of the systems. As you will see, many automated scans miss vulnerabilities, although they can also provide useful insights.
Nmap scripting engine (NSE) and advanced scanning
The Nmap scanner has a powerful feature known as the Nmap scripting engine (NSE). In addition to the scanning features that are built into Nmap, Nmap can be extended with scripts that add other capabilities. Nmap is distributed with a number of scripts (developed by various people), and these add more types of version detection and even do some vulnerability detection.
==VM: On the Kali Linux (security tester) VM==:
==action: Look at the list of files contained in /usr/share/nmap/scripts/:==
ls /usr/share/nmap/scripts/
Note: And/or browse using a file browser, such as Dolphin.
==action: View the contents of “distcc-cve2004-2687.nse”==. ==hint: Consider using vi==.
This script is written in the Lua programming language, and it checks for a specific DistCC vulnerability.
==action: Open the Nmap man page, and read the description under the heading “NMAP SCRIPTING ENGINE (NSE)”==. ==hint: Note that “-sC Performs a script scan using the default set of scripts. […] Some of the scripts in this category are considered intrusive and should not be run against a target network without permission.”==
==action: Launch an Nmap scan using the default set of scripts (where IP address is the Linux Server VM):==
nmap -sC ==edit:IP-address==
==action: Launch an Nmap scan using vulnerability scanning scripts (where IP address is the Linux server VM), and inspecting the first 5k port numbers:==
nmap --script vuln -sV -p 1-5000 ==edit:IP-address==
Note: This can take a while to complete.
==action: When this completes, read through the output==.
Question: What vulnerabilities did it detect?
Nmap scripts have a lot of potential; however, the current set of scripts only check for a limited number of vulnerabilities.
Based on what you have learned:
Question: Use the man page to answer: what does the --script Nmap flag do?
Action: Extra challenge: exploit a vulnerability detected by the Nmap script scan.
Nessus
Nessus, by Tenable Network Security, is one of the most popular commercial vulnerability scanners. Vulnerability tests are written using NASL (the Nessus Attack Scripting Language), and subscriptions to “feeds” of vulnerability checks are available. The “Essentials” feed is available for use for no cost, but is limited to scanning a limited number of hosts, while the “Professional” feed receives updates sooner and can be used in larger commercial settings.
Nessus is based on a client/server architecture, where a client (such as the web interface) connects to the server, which does the scanning. Results can be imported into Metasploit.
In addition to vulnerability scanning, Nessus can be used for compliance checks (such as checking the security policies on networked systems by giving Nessus credentials to manage them).
==action: Start Firefox in the Kali VM, and visit (if Nessus is still initialising, please read ahead):==
https://localhost:8834
Username: nessusadmin, password: nessusadmin01
==action: Confirm the security exception, if prompted==. ==hint: The warning is shown because the site is secured using a self-signed certificate==.
==action: Login with username: “nessusadmin”, password: “nessusadmin01”==.
Tip: If at any point using Nessus you get an error message saying you don’t have API access, simply clear the cache by pressing Ctrl+Shift+Delete.
Warning: Nessus can take a long time to be ready to do a scan, if you have worked down to this point and Nessus is still initialising plugins: skip past this section to Web Vulnerability Analysis and come back to this immediately after.
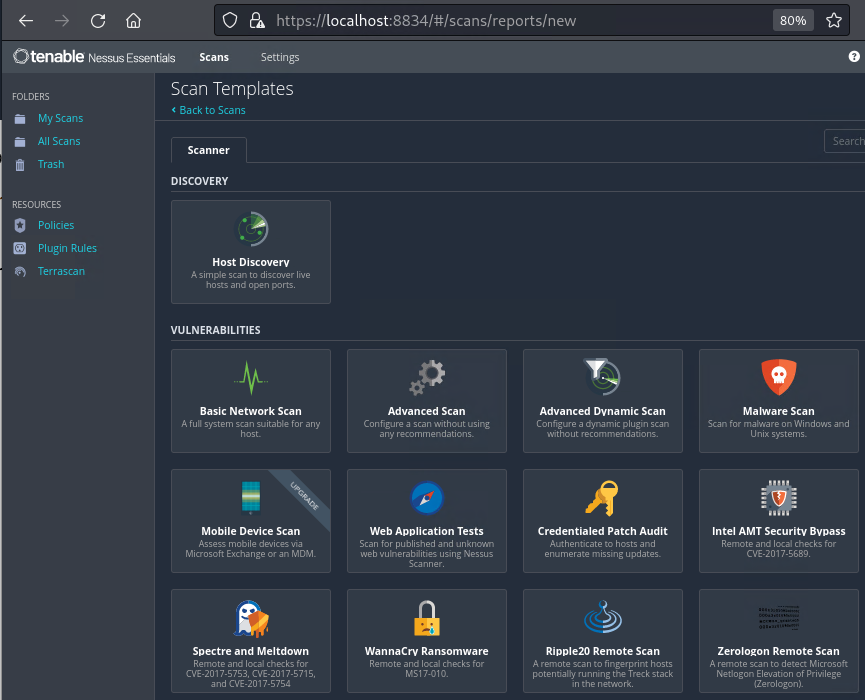
==action: Create a new Scan==.
![]()
Note that there are various scanning profiles available, and depending on your selection Nessus will check the target(s) for different types of security issues.
==action: Select ‘Basic network scan’==. ==action: When prompted, provide the scan name and IP addresses to scan the target Linux server==.
For example (but ==edit:substituting the first three octets from your Kali IP address==):
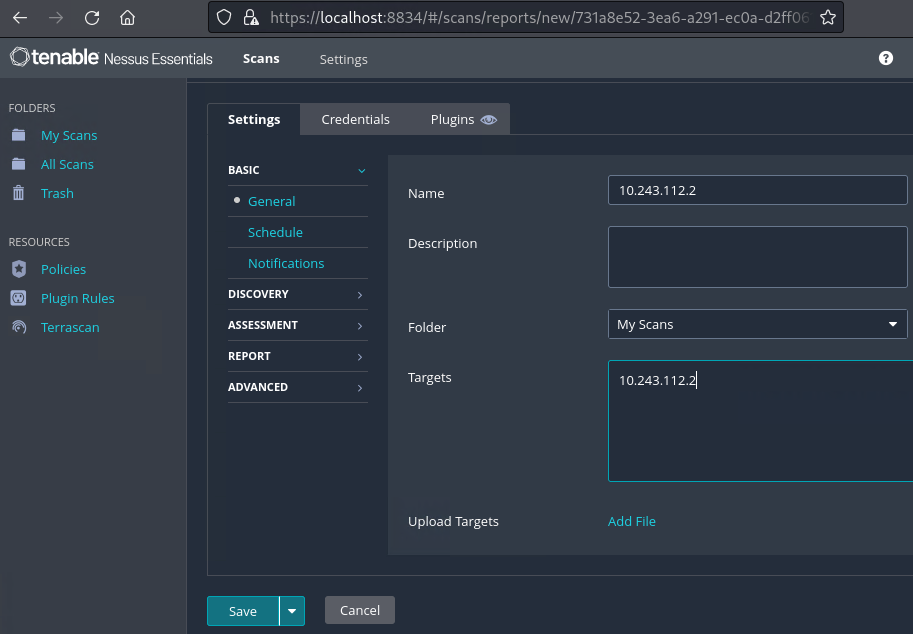
==action: Save and click “Launch”, and view the results as they become available==. The Nessus scan is quite detailed, and will take some time to complete.
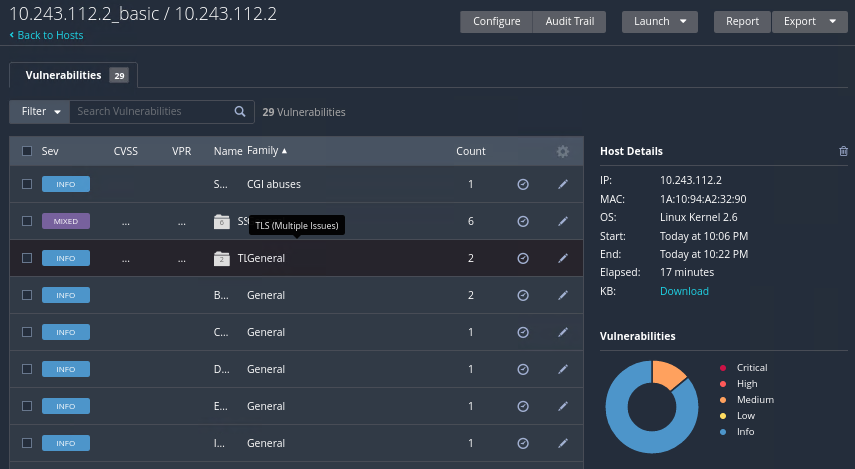
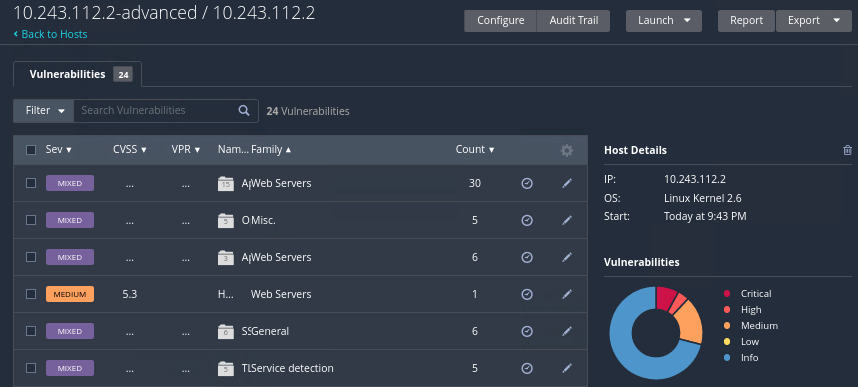
==action: Click “Vulnerabilities”, to view the security vulnerabilities that have been detected==.
==action: Browse through the list of detected vulnerabilities (if there are not any yet, just wait a while), and click on one of the issues to view more detailed information==.
Read through the information for each vulnerability and answer the following:
Question: What is the CVE for this vulnerability?
Question: Are exploits available? What kind? (Stand alone, MSF, etc)
Question: What would be the likely result of an attack on this vulnerability?
Question: How would you fix this issue?
==action: Click through to details of the detected vulnerabilities, and read through the descriptions provided==.
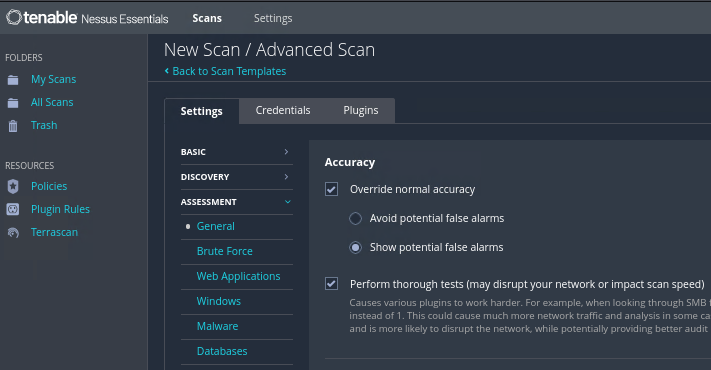
==action: Start a new Advanced Scan (figure it out by exploring the interface), and enable thorough tests, and also show potential false alarms==.
Once the scan is complete:
Answer the following questions.
Question: How many vulnerabilities did it detect as compared to the Basic scan?
Question: How many of the vulnerabilities did you miss when you previously scanned these systems using Nmap?
Question: How many vulnerabilities did Nessus miss compared to the Nmap vuln scan?
Question: How many vulnerabilities that were detected are “critical”, “high”, and so on? (Make a note of the number of vulnerabilities)
==action: Click “Export Results”, and generate various HTML reports. View the output of these reports==.
What information from these reports do you think you would use:
Question: during a penetration test?
Question: when writing a report for the management of a company that hired you to test their systems?
Question: when writing a report for the IT department of the company?
Action: Extra challenge: save and import the results into MSF. Consider exploiting vulnerabilities detected by the Nmap and Nessus vulnerability scan, to confirm the system is vulnerable.
Web vulnerability analysis
In addition to tests to look for vulnerable software running as remote services (and compliance checks regarding client system configuration), security testers often have to test the security of web servers. While the above vulnerability scanners will do some testing of web servers that are detected, there are also a number of vulnerability scanners that exclusively scan web servers for software and misconfiguration vulnerabilities.
Nikto is a command line web vulnerability scanner. Nikto scans for over 6000 security issues, such as dangerous CGI scripts and permissions.
==action: Use Nikto to scan the Linux server VM==.
nikto -host ==edit:Target-IP-Address==
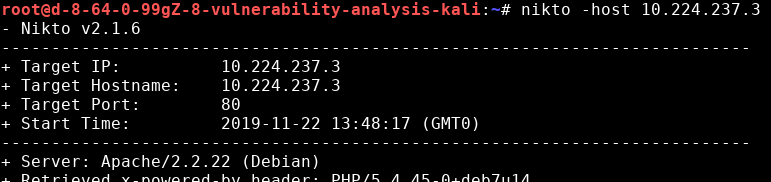
==action: Take some time to read and understand the output==.
Question: How many critical vulnerabilities did Nikto detect?
Question: Did it detect any that the above scanners missed?
Hint: You might wish to visit a vulnerable web server (detected by nikto) running on ports 80 and 443. If, when attempting to access it via your browser, you’re met with a “server not found” error, try disabling the proxy in web-browser proxy settings in the Kali VM or add an exclusion for 10.*.*.*. If you then visit you’ll notice a vulnerable Wordpress instance running.
Hint: Visiting the vulnerable wordpress web site is not necessary for the flags
Warning: If you changed proxy settings you may need to switch your settings back to re-access Nessus.
Some final considerations
Question: The Linux server had multiple remotely exploitable vulnerabilities, and local privilege escalation vulnerabilities. How many of these were actually detected by the automated tools?
Question: Did a version of Wordpress get detected at any point in all of the above? Does it have vulnerabilities detected by any of these tools?
Question: What does this teach you about relying on automated tools too heavily during security assessments?
Flag: Go find yourself some flags! There are various vulnerabilities, similar to previous weeks. There is also a new privilege escalation vulnerability this week – so something new for you to try to identify and exploit (another sudo vulnerability).
Hint: Some vulnerable services could be already patched. Thus, consider attacking all available services.
Hint: To get all flags you might need to escalate privileges to root. There are numerous sudo-related vulnerabilities that can be used to escalate privileges to root after gaining initial access to a system. Notice sudo version - this will help to identify an exploitable vulnerability. Also keep in mind the limitation related to the fact that you do not know the user password (this is because you have gained the shell access via a vulnerability, not by logging in to the system; thus, you are even more limited in what you can do - you cannot exploit the same sudo vulnerability as in the previous lab). Instead, you can search Metasploit for the sudo_baron_samedit exploit. The exploitation complexity is moderate and may require upgrading your current shell to a Meterpreter session. Find how to do it on your own (or read this if you are feeling lazy 😉) https://infosecwriteups.com/metasploit-upgrade-normal-shell-to-meterpreter-shell-2f09be895646 .

Hint: Before attempting exploitation of sudo_baron_samedit verify whether the target system is actually vulnerable. Review the exploit details using the info command in Metasploit, paying close attention to the affected versions of Linux, sudo, and the libc library. Then, check these versions on your target VM to determine if the exploit is applicable. If it does not seems to be vulnerable, there is still an alternative method on this Debian system to obtain root access and retrieve the final flag. But this is an advanced task. Do not be discouraged if you are unable to complete it.
Hint: Inspect the /etc/default/ directory. You can find there an file - the initscript, which is related to a vulnerable network service you have already experienced with. This script is executed at system boot by the root user. Although the file is owned by root, it appears to have misconfigured permissions that allow other users to read and modify it. You can append a command to this file, for example (revise the very first lab “Intro to Linux Security”):
echo "==edit:bash-command-to-create-bind-or-reverse-shell==" >> /etc/default/==edit:name-of-the-network-service==
Hint: By doing so, you can insert a command that establishes a bind or reverse shell each time the system reboots. You may use netcat, which can act as both a listener and a client on Kali and Debian (revise the lab “Vulnerabilties. Exploits and Remote Access Payloads” or read this https://www.invicti.com/learn/reverse-shell and this https://infosecwriteups.com/create-bind-and-reverse-shells-using-netcat-c53b23df8059).
Conclusion
At this point you have:
-
learned about vulnerability assessment;
-
run vulnerability scans using various industry standard tools, including Nessus and Nikto;
-
understood that different tools will detect different security issues, and that it is important to consider which tests (and scan profiles) to run.
Well done!